


Use this guide to add your AmailPlus email account to Microsoft Outlook on Android. Follow the screenshot sequence below; button labels may vary by Outlook version.
Before you begin
- Your AmailPlus service must be active and the mailbox must already exist.
- Have your full email address, such as [email protected], and its mailbox password ready. This may differ from your Aveshost client-area password.
- Check that you can sign in to AmailPlus webmail before configuring the app.
Replace [email protected] with your own address. Menu names can vary with the version of your operating system or app.
Step 1: Open Microsoft Outlook
Open the Microsoft Outlook app. If needed, install or update it from the Google Play Store.

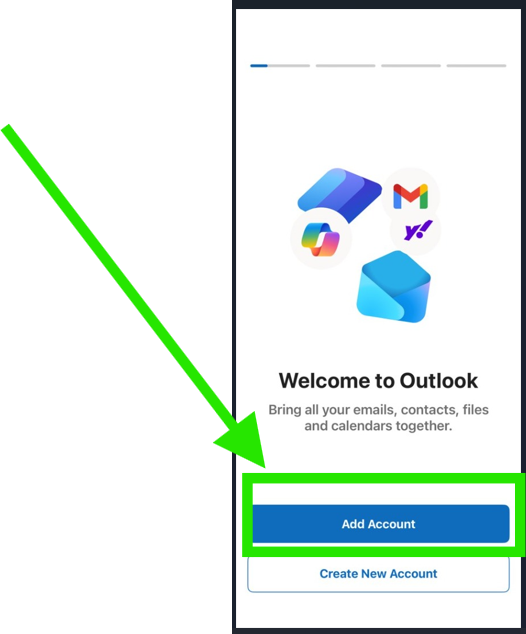
Step 2: Tap Add Account
On the welcome screen, tap Add Account. If you already use Outlook, open the profile menu, tap the Settings gear and select Add Mail Account → Add Email Account.
Step 3: Enter your email address
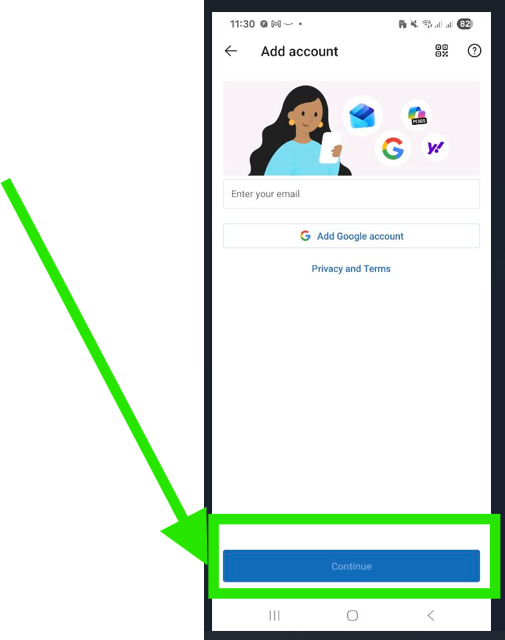
Enter your full AmailPlus address, such as [email protected], and tap Continue.
Step 4: Select IMAP
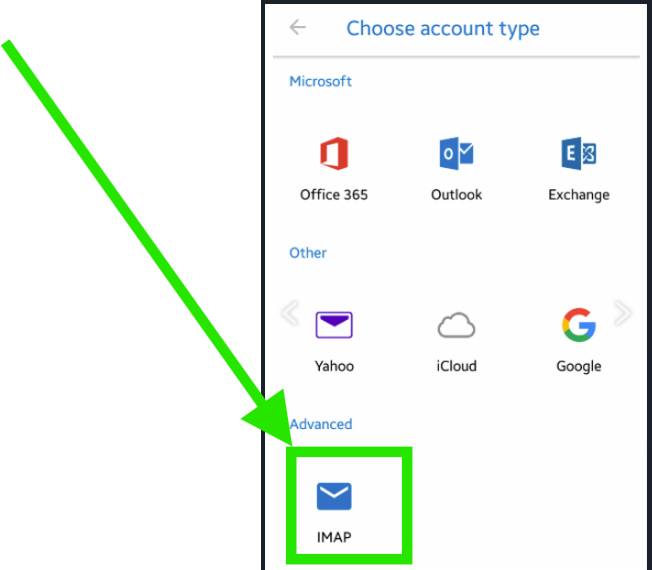
Choose IMAP when Outlook asks for the account type. If it detects the wrong provider, use Not a … account? or the equivalent manual-setup option.
Step 5: Enter your details and open advanced settings
| Field | Value |
|---|---|
| Email Address | Your full email address, e.g. [email protected] |
| Password | Your mailbox password |
| Display Name | Your name or business name |
| Description | AmailPlus |
Enable Advanced Settings to reveal the incoming and outgoing server fields.
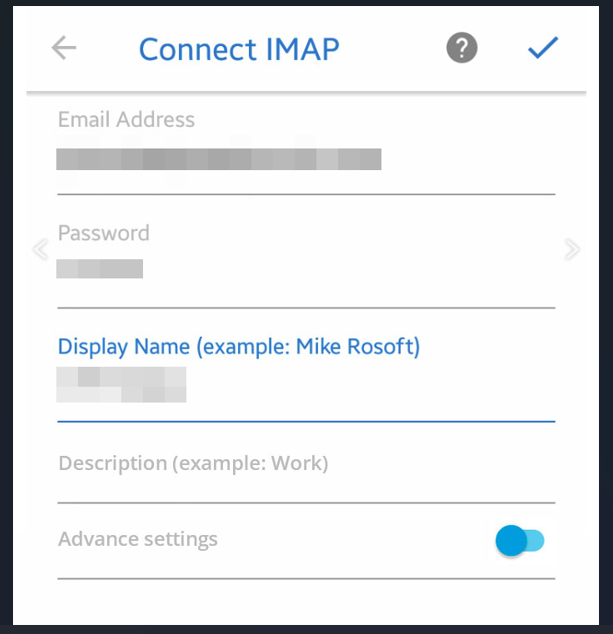
Account details in this screenshot are concealed. Enter your own mailbox details.
Step 6: Configure the incoming and outgoing servers
| Field | Value |
|---|---|
| Incoming server (IMAP) | imap.amailplus.com |
| Incoming port and encryption | 993 — SSL/TLS |
| Outgoing server (SMTP) | smtp.amailplus.com |
| Outgoing port and encryption | 465 — SSL/TLS (recommended) |
| Alternative outgoing connection | 587 — STARTTLS |
| Username for both servers | Your full email address, e.g. [email protected] |
| Password for both servers | Your mailbox password |
| SMTP authentication | Required; use the same credentials as incoming mail |
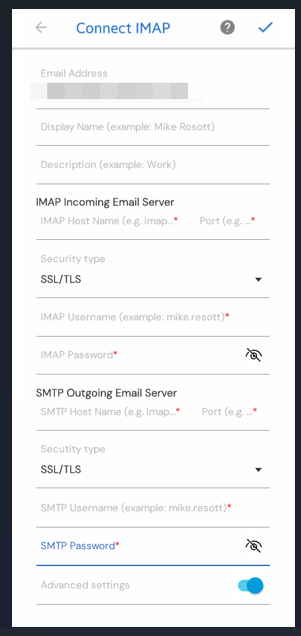
Supply the full email address and mailbox password for both IMAP and SMTP. For the recommended SMTP connection, select SSL/TLS and port 465. If you prefer the supported alternative, select STARTTLS and port 587.
If no separate port field is available in your version, use imap.amailplus.com:993 and smtp.amailplus.com:465. Do not enter https:// in either server field.
Tap the tick (✓) in the top-right corner, or the Sign In / Add Account button shown in your version.
Step 7: Finish and open your Inbox
Wait for Outlook to verify the account. Follow the remaining prompts and skip adding another account if you do not need one. Open your AmailPlus Inbox and allow the first synchronisation to finish.
Check that email works
- Open the new account's Inbox and allow time for the first synchronisation.
- Send a message to an external email address.
- Reply from that external address and confirm the reply reaches this account.
- Check webmail if a folder or message is missing. With IMAP, server-based messages and actions synchronise between compatible clients.
Calendar and contacts: IMAP configures email. It does not, by itself, add AmailPlus calendars, contacts or Drive. Use webmail or the separate supported setup options for those features.
Having trouble connecting?
- Sign-in fails: Check the full email address and mailbox password by signing in to webmail. Remove accidental spaces and check Caps Lock.
- Receiving works but sending fails: Supply the SMTP username and password even if the app labels them optional. SMTP authentication is required.
- Server connection fails: Check the exact server names and port/encryption pairs: IMAP 993 with SSL/TLS; SMTP 465 with SSL/TLS, or 587 with STARTTLS. Do not enter
https://in a mail server field. - A certificate warning appears: Recheck the server names and your device's date and time. Do not disable encryption to bypass the warning; contact support if it persists.
- Webmail works but the app still rejects the password: If additional account security is enabled, ask Aveshost Support whether a separate app password is required for your mailbox.
Need help? Contact Aveshost Support with the app version, affected email address and error message. Never send your password or verification codes.
App menu reference: Microsoft: set up an IMAP account in Outlook mobile.
