


Connect your AmailPlus mailbox to Microsoft Outlook Classic for Windows using the manual account setup below.
Does Outlook look different on your PC? If you are using New Outlook, follow the AmailPlus setup guide for New Outlook.
Before you begin
Make sure your AmailPlus mailbox has already been created in the Aveshost client area and have these details ready:
- Your complete email address, for example [email protected].
- The password for that mailbox, which may differ from your Aveshost client-area password.
You can check your credentials by signing in to AmailPlus webmail. Replace the example address in this guide with your own.
Step 1: Open File in Outlook Classic
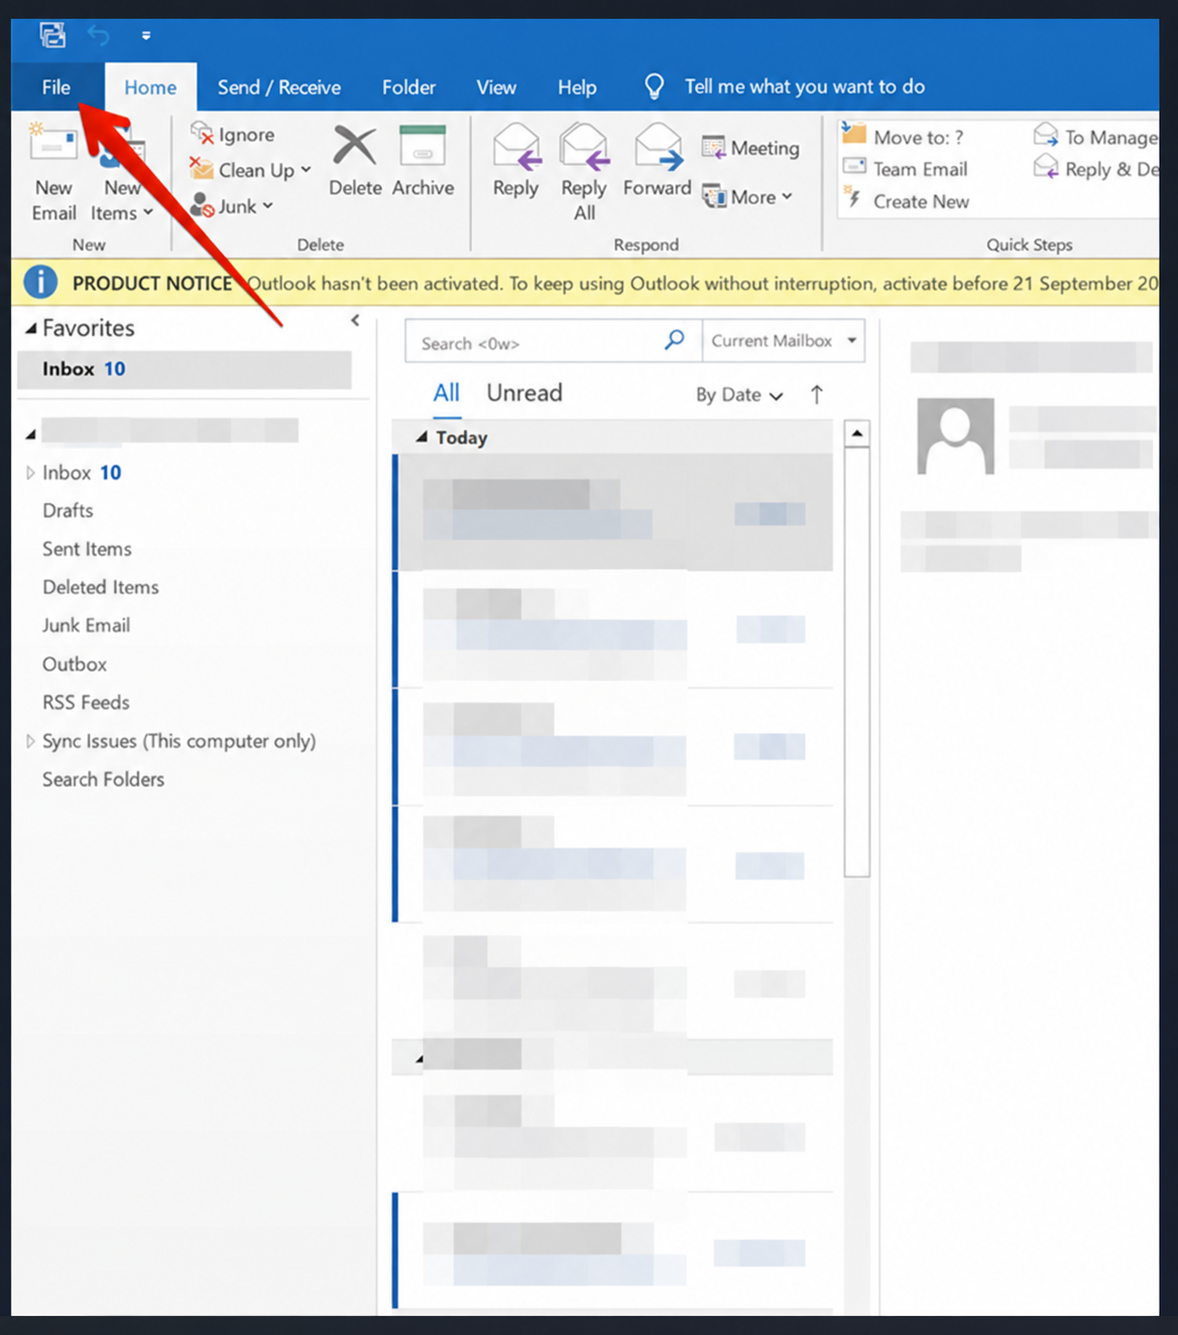
Launch Outlook Classic and select the File tab at the upper left.
Step 2: Open Account Settings
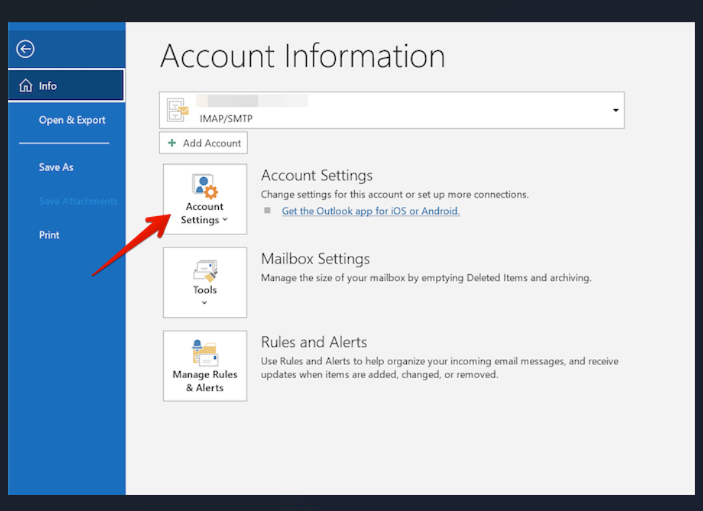
On the Account Information screen, click Account Settings.
Step 3: Select Manage Profiles
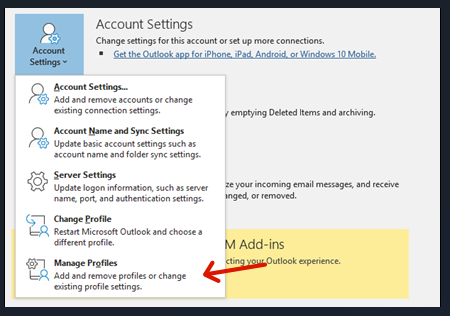
Choose Manage Profiles from the Account Settings menu. This guide uses that route to reach Outlook's manual account configuration.
Step 4: Open Email Accounts
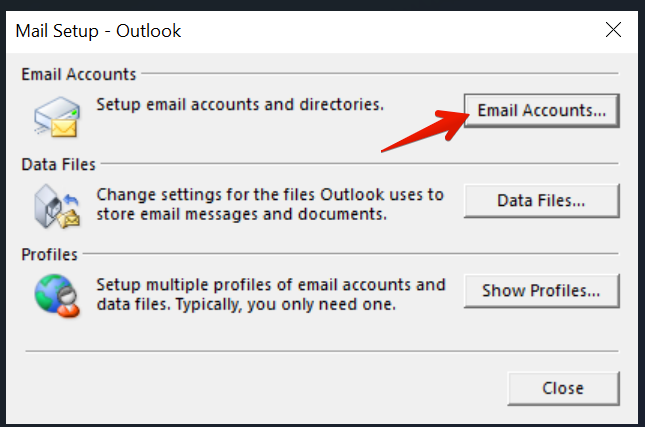
In the Mail Setup – Outlook window, click Email Accounts.
Step 5: Start adding a new account
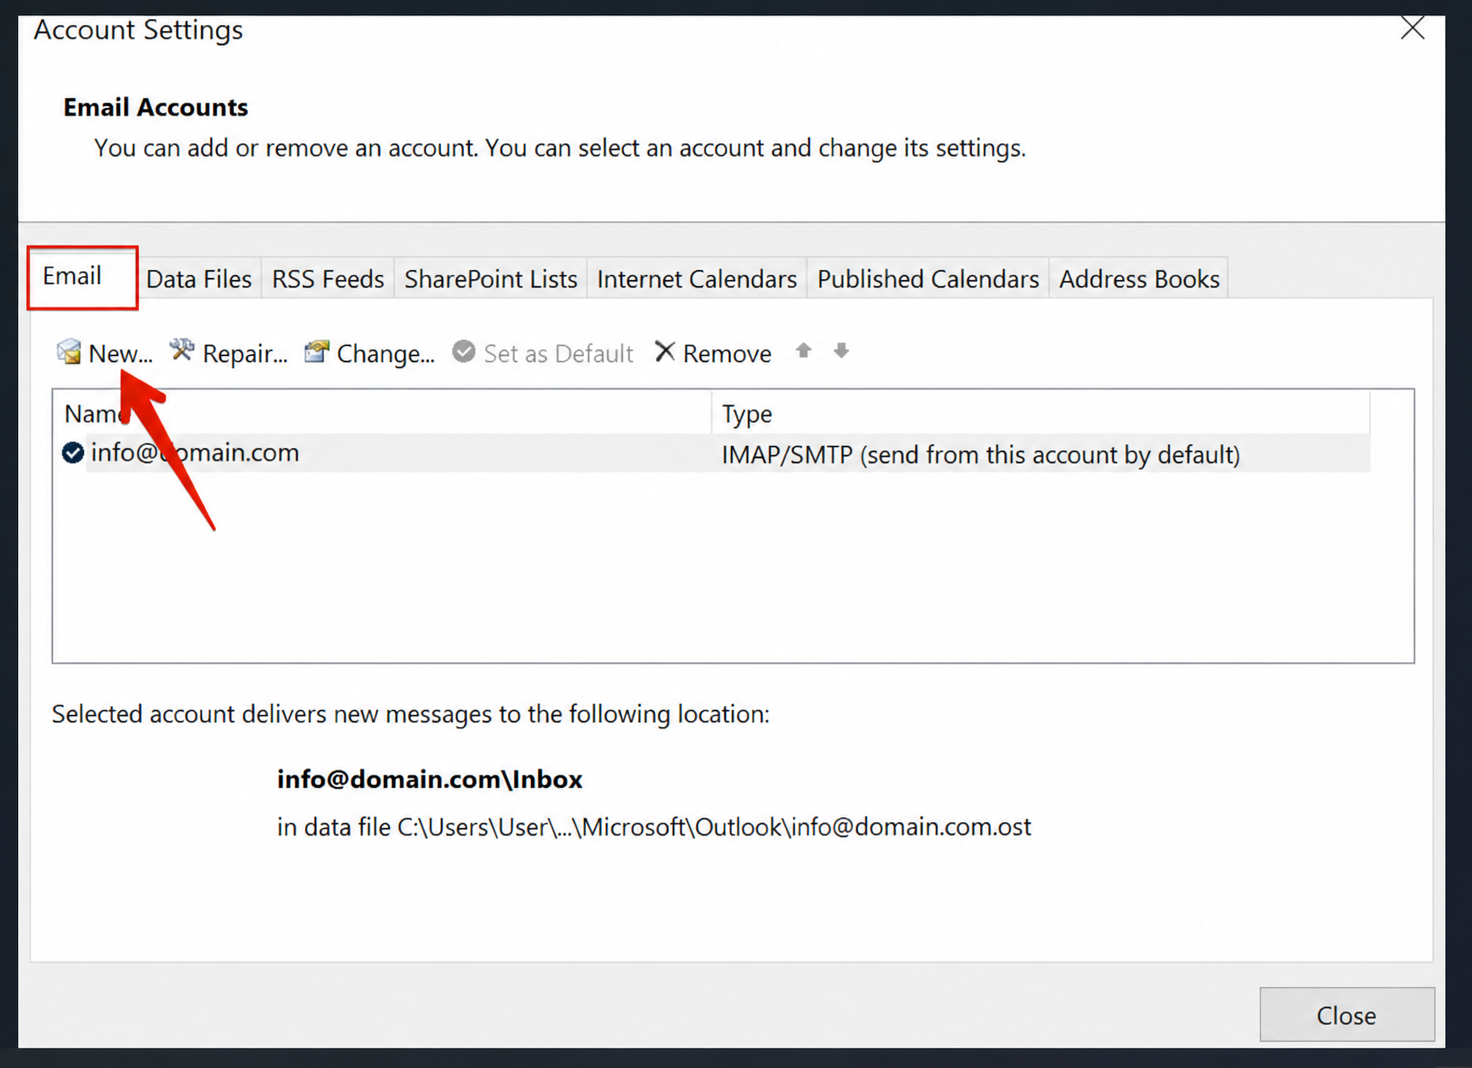
Select the Email tab, then click New.
Step 6: Choose manual setup
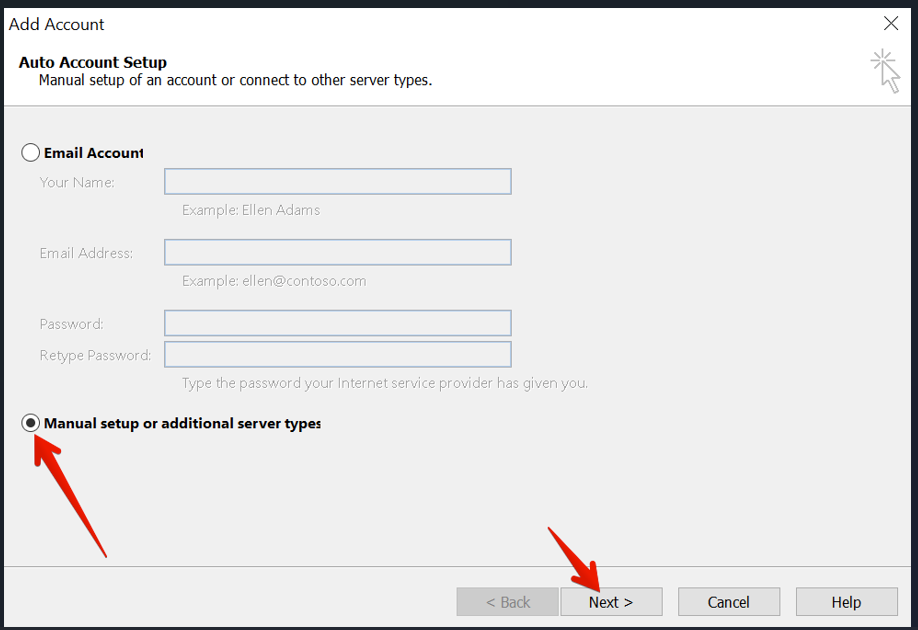
Select Manual setup or additional server types, then click Next.
Step 7: Choose POP or IMAP
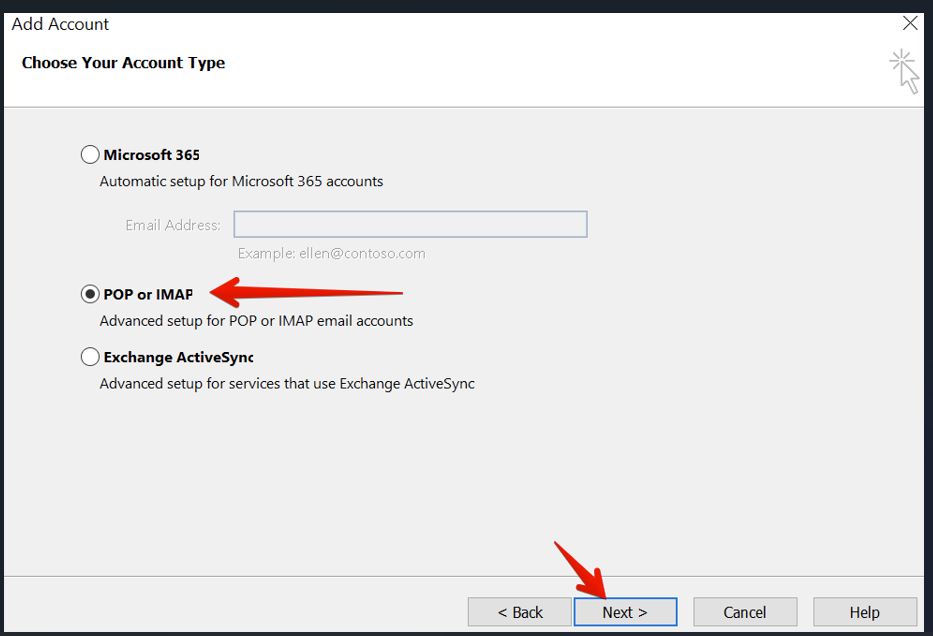
Select POP or IMAP and click Next. You will choose IMAP for your AmailPlus account on the following screen.
Step 8: Enter your AmailPlus account details
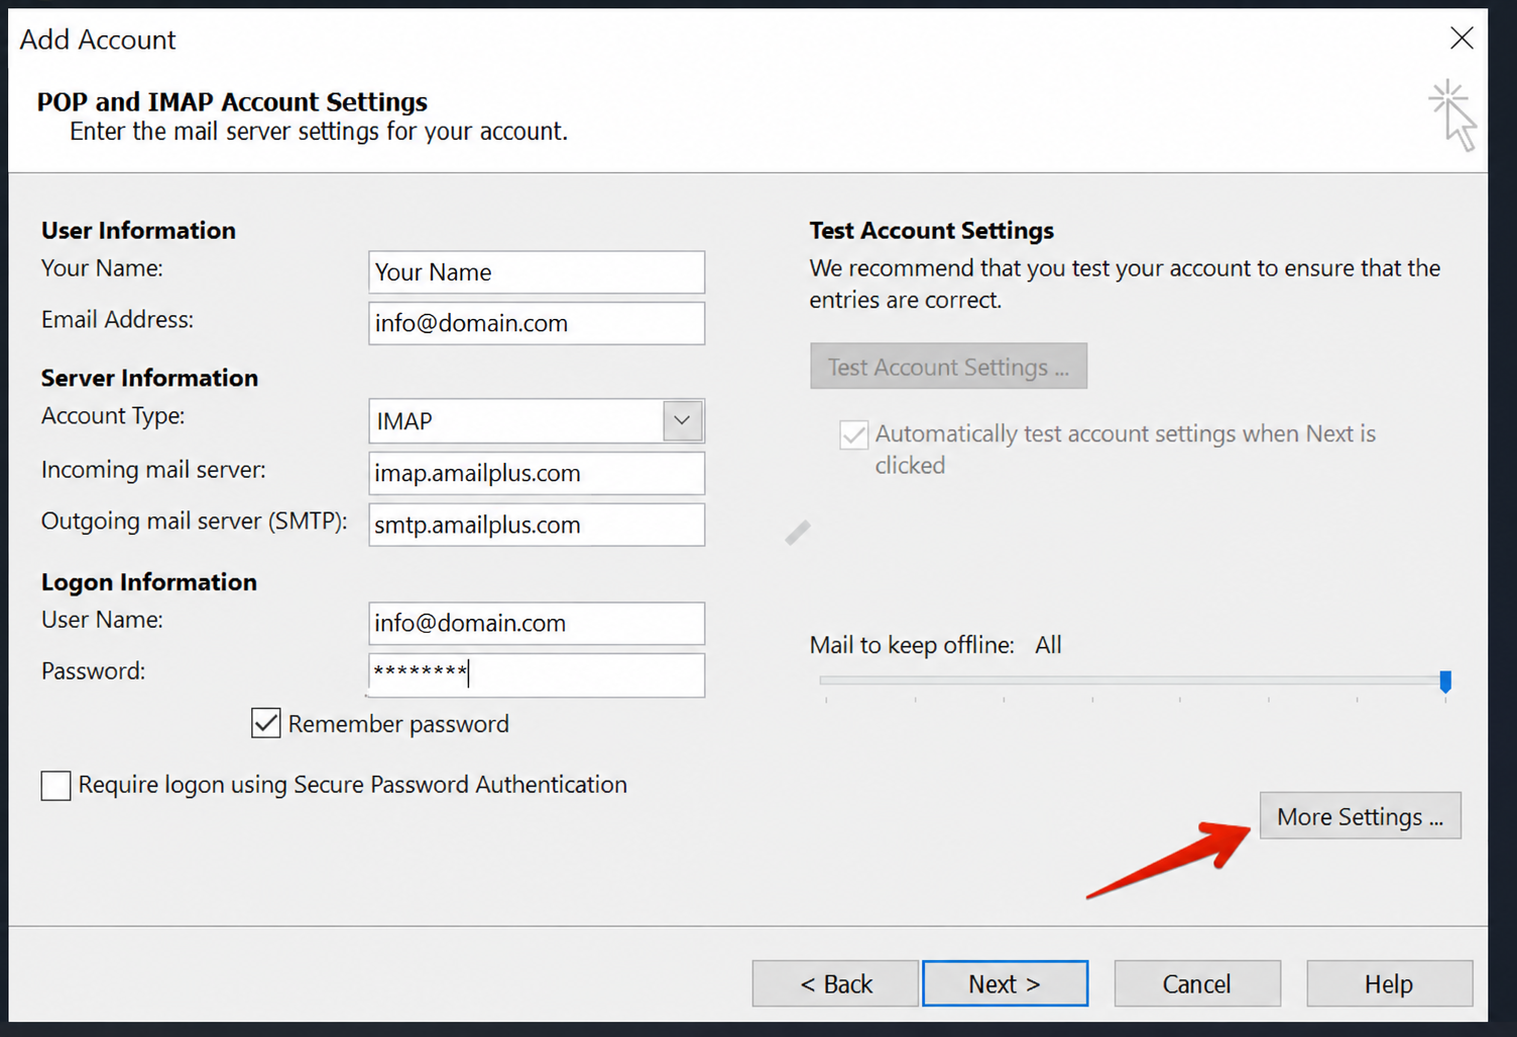
Complete the account form using the settings below.
| Setting | Value |
|---|---|
| Your Name | Your name or business name |
| Email Address | Your full email address, e.g. [email protected] |
| Account Type | IMAP |
| Incoming mail server | imap.amailplus.com |
| Outgoing mail server (SMTP) | smtp.amailplus.com |
| User Name | Your full email address, e.g. [email protected] |
| Password | Your mailbox password |
Leave Require logon using Secure Password Authentication (SPA) unchecked. After completing the fields, click More Settings.
Step 9: Enable outgoing server authentication
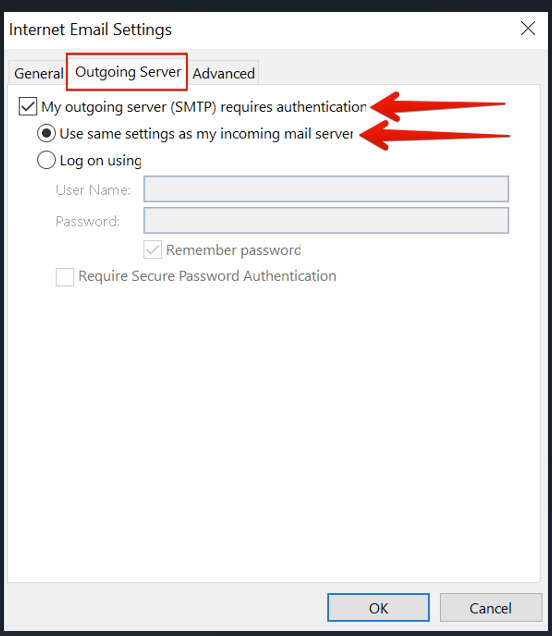
Open the Outgoing Server tab. Check My outgoing server (SMTP) requires authentication, then select Use same settings as my incoming mail server.
Step 10: Configure encryption and ports
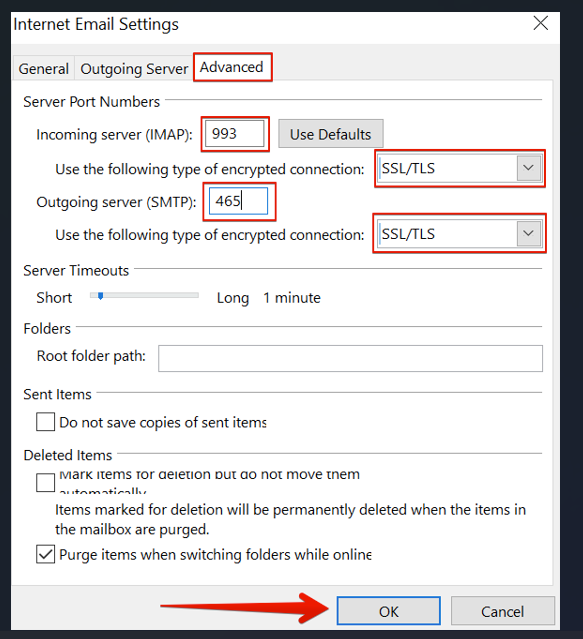
Open the Advanced tab and configure these settings:
| Setting | Value |
|---|---|
| Incoming server (IMAP) | 993 |
| Incoming encrypted connection | SSL/TLS |
| Outgoing server (SMTP) — recommended | 465 with SSL/TLS |
| Alternative outgoing server connection | 587 with STARTTLS |
Select encryption before entering the ports. Outlook can reset a port when you change its encryption selection. Recheck both port numbers afterwards.
The screenshot uses the recommended combination: IMAP 993 + SSL/TLS and SMTP 465 + SSL/TLS. Click OK when the settings are correct.
Step 11: Test the account settings
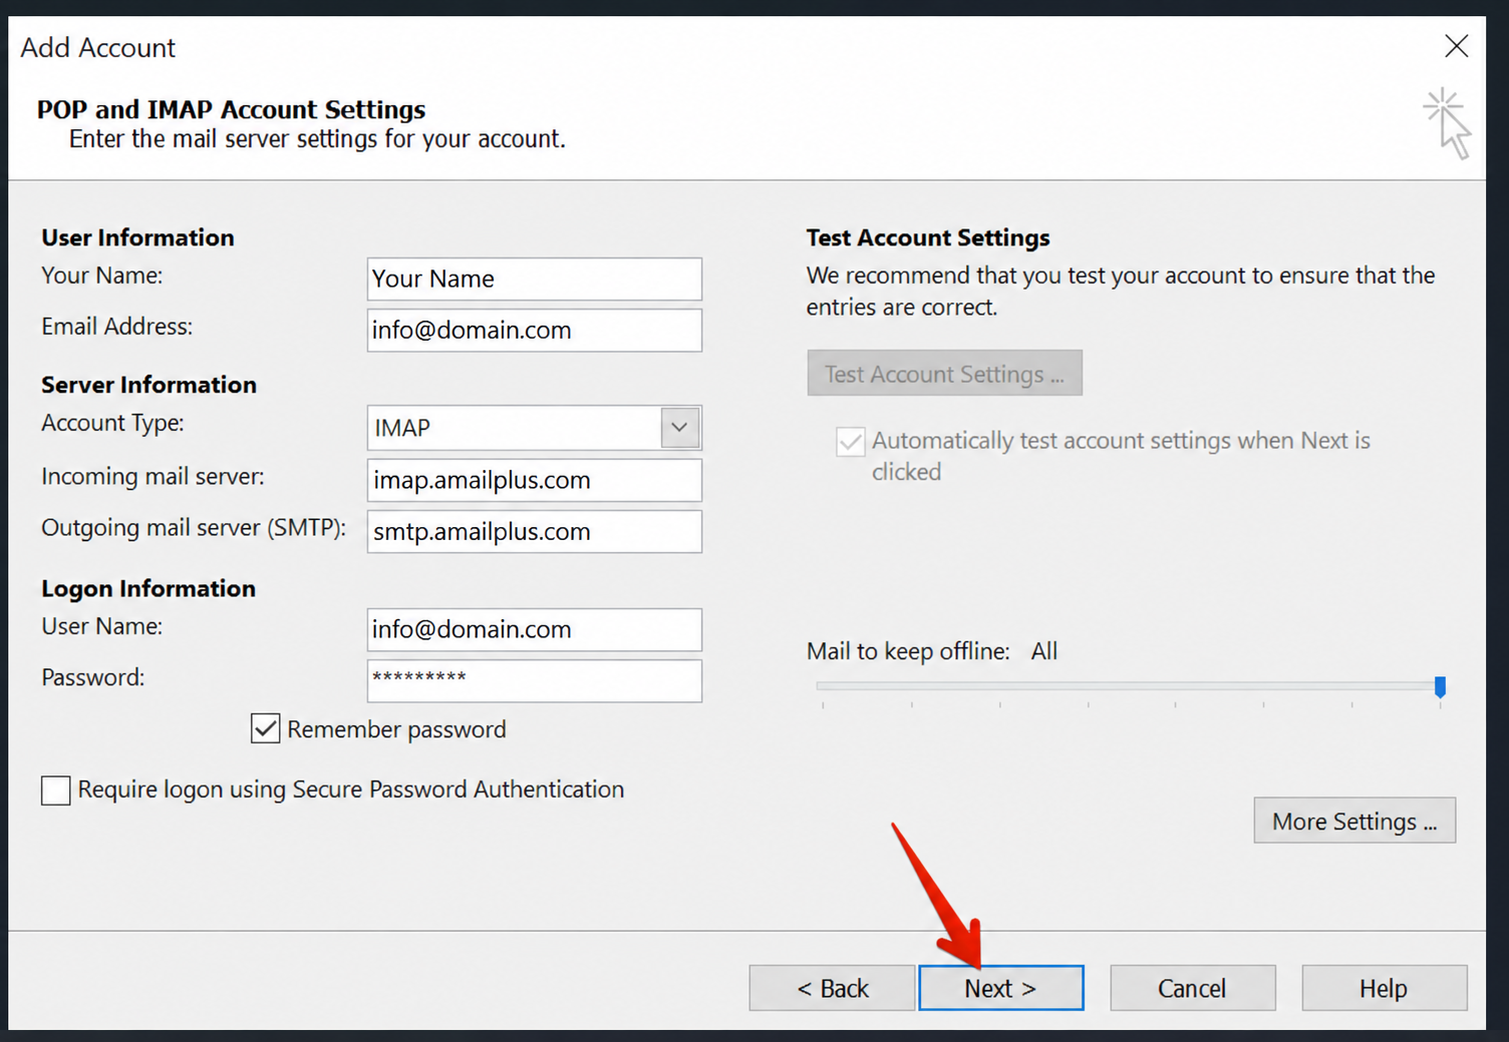
Back in the account setup window, click Next. Outlook will test the incoming login and outgoing email connection.
Step 12: Confirm both tests succeed
Check that both tasks show green ticks and a Completed status. Then click Close.
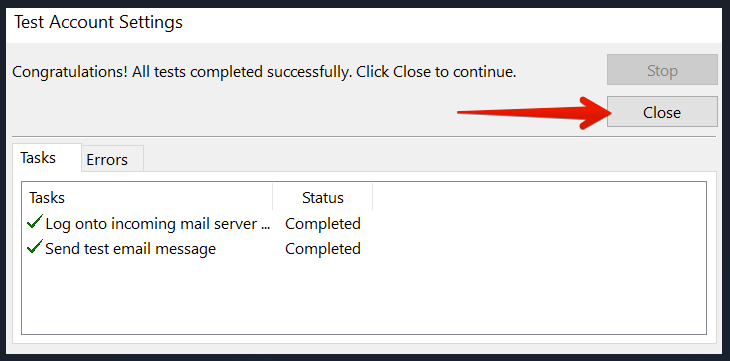
If either test fails: Recheck the full email address, mailbox password, server names and port/encryption pairs. If receiving works but sending fails, confirm that SMTP authentication is enabled. You can also close and reopen Outlook before trying again. Contact Aveshost Support if the error persists; do not disable encryption to bypass a certificate warning.
Step 13: Finish setup
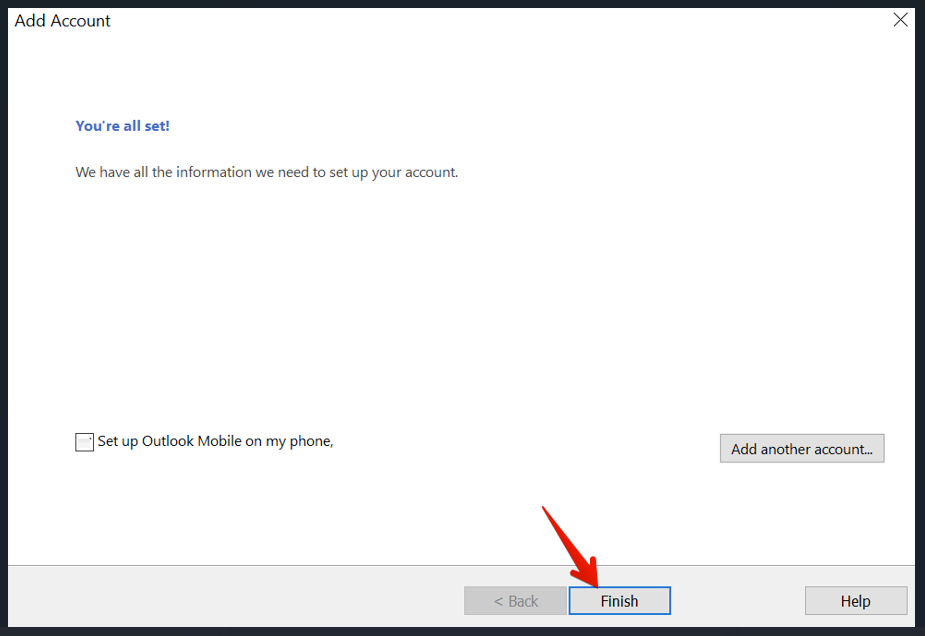
Click Finish. Return to Outlook and allow your AmailPlus folders to synchronise.
Need help?
Contact Aveshost Support with the error message and your Outlook version. Never share your mailbox password or verification codes.
