


This guide explains how to add your Aveshost AmailPlus mailbox to Outlook (New) using IMAP.
Does your Outlook look different? If you use Outlook Classic, follow our Outlook Classic setup guide.

Before You Begin
Make sure your AmailPlus mailbox has already been created and have these details ready:
- Your complete email address, such as [email protected].
- Your mailbox password.
About the screenshots: These show the account-setup screens used in this walkthrough, with example account details adapted for AmailPlus. Some screens have a Mac-style layout; the controls and order of prompts can differ in Outlook for Windows. If there is no globe icon, use Settings > Accounts > Add account to start. See Microsoft's Outlook for Windows instructions for the current layout.
Step 1: Open Outlook
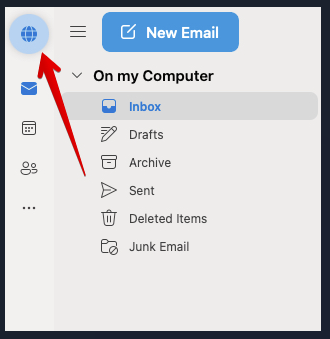
Launch Outlook. In the layout shown below, select the globe icon at the upper left to open the account menu.
If you are opening Outlook for the first time and the email-address prompt is already displayed, go straight to Step 3.
Step 2: Add an email account
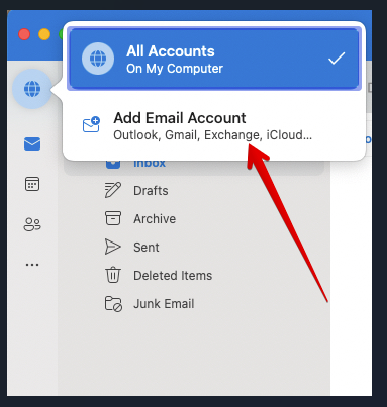
Select Add Email Account. On versions that use the Settings menu, select Add account under Accounts.
Step 3: Enter your email address
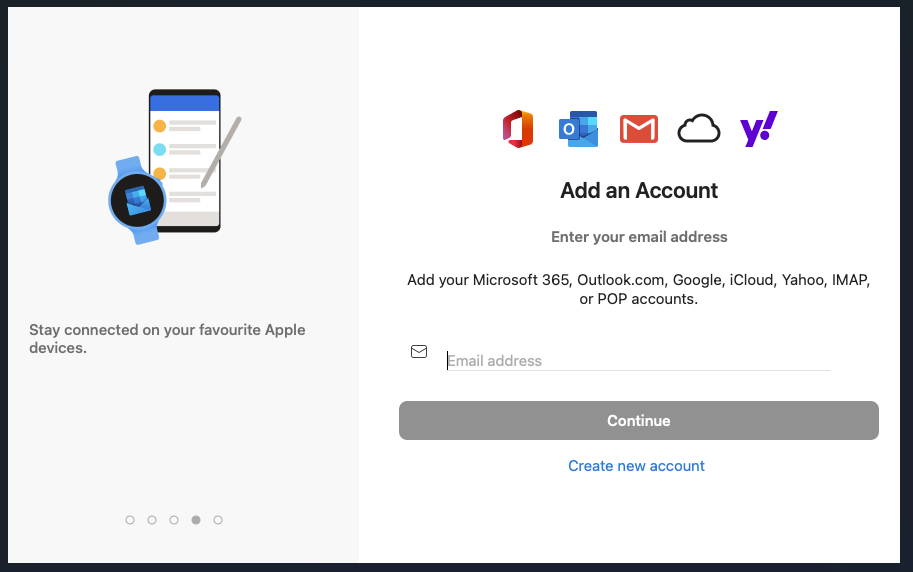
Enter your full AmailPlus email address, then select Continue. Use your own mailbox address in place of the example [email protected].
Step 4: Review the sync prompt
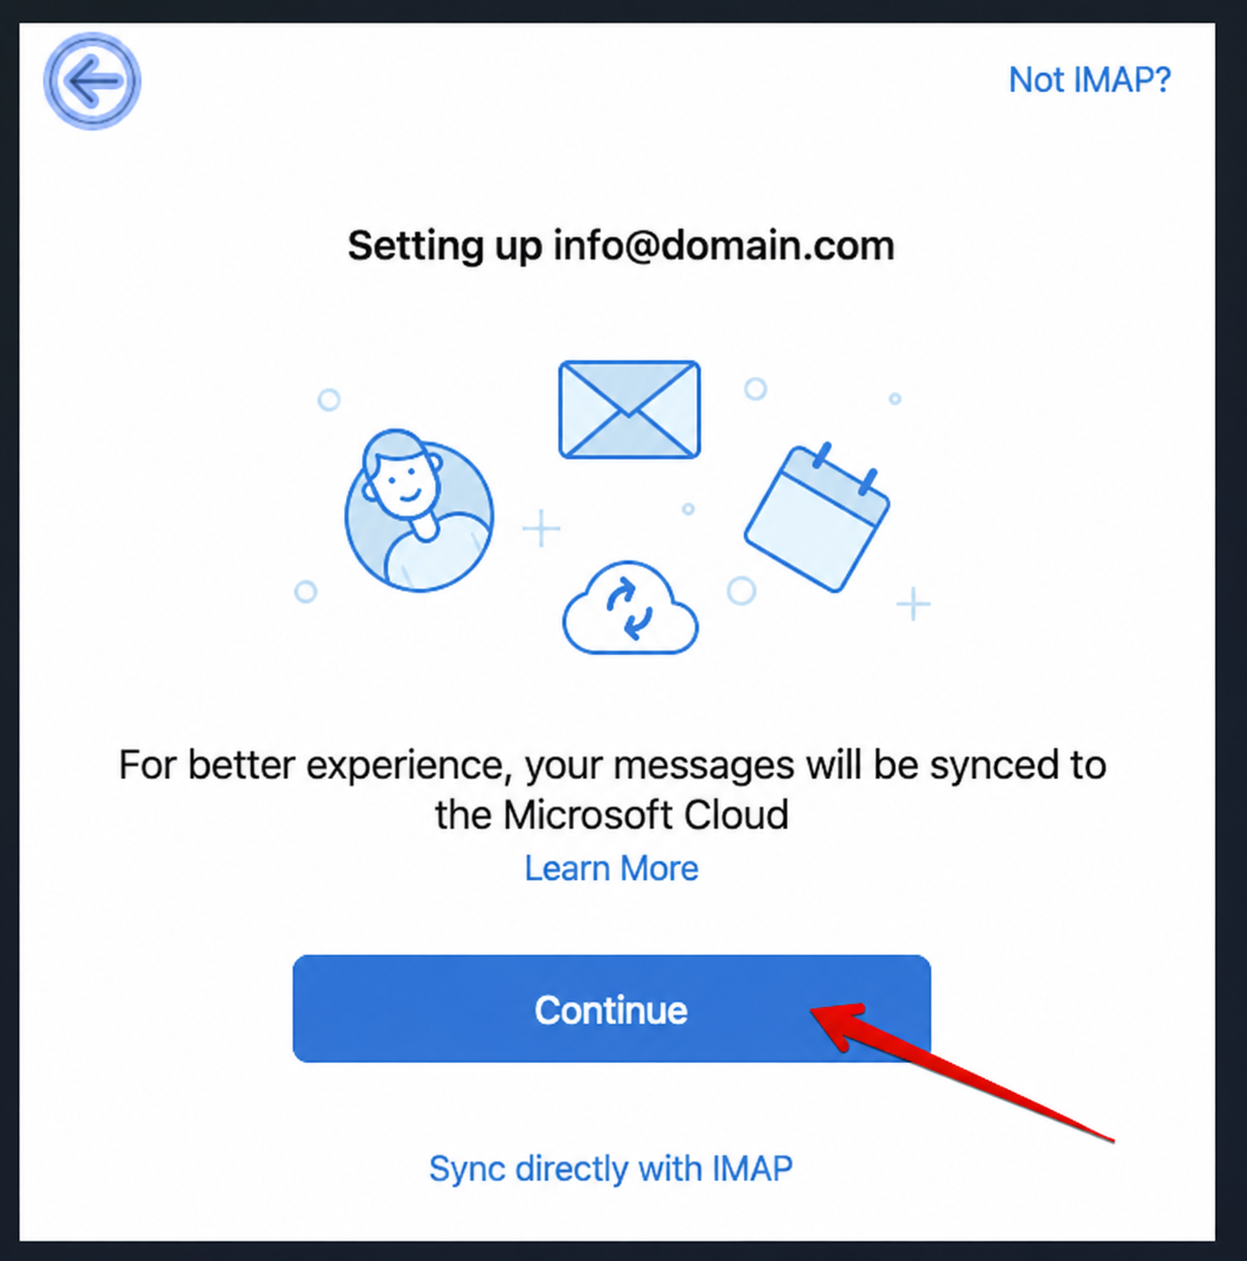
If Outlook displays the Microsoft Cloud screen below, read the notice explaining that your messages will be synced to Microsoft's cloud. Select Continue if you agree to that sync method.
Step 5: Show advanced settings
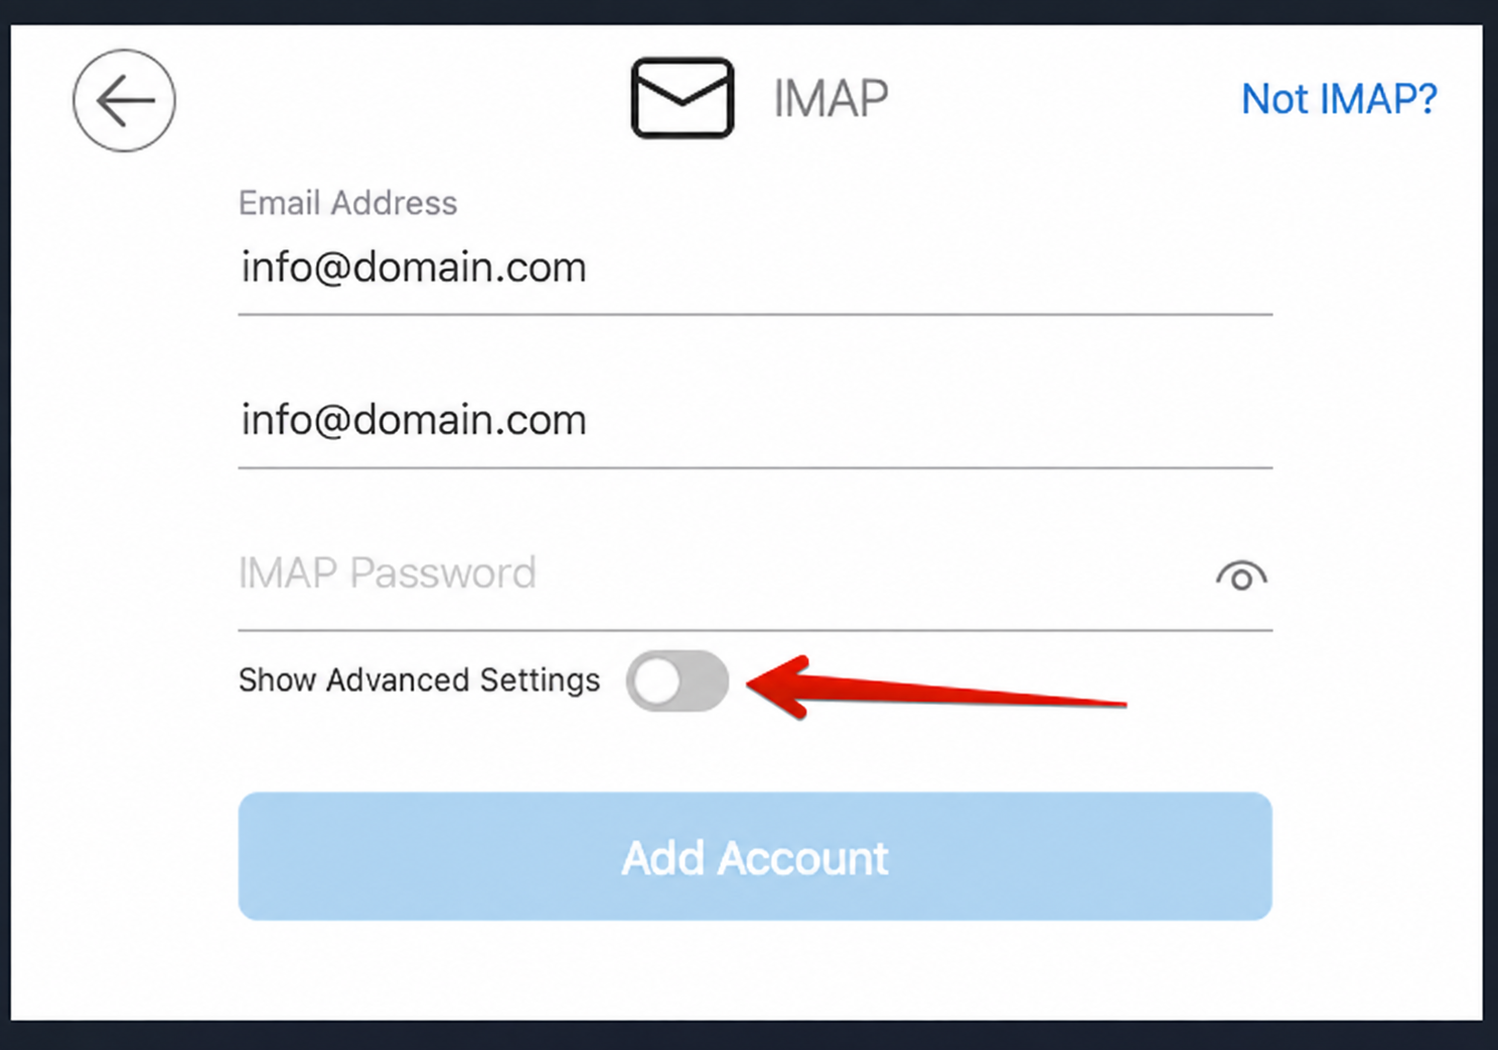
On the IMAP setup screen, turn on Show Advanced Settings to display the incoming and outgoing server fields. If Outlook asks for an account type, choose IMAP.
Step 6: Enter your AmailPlus server settings
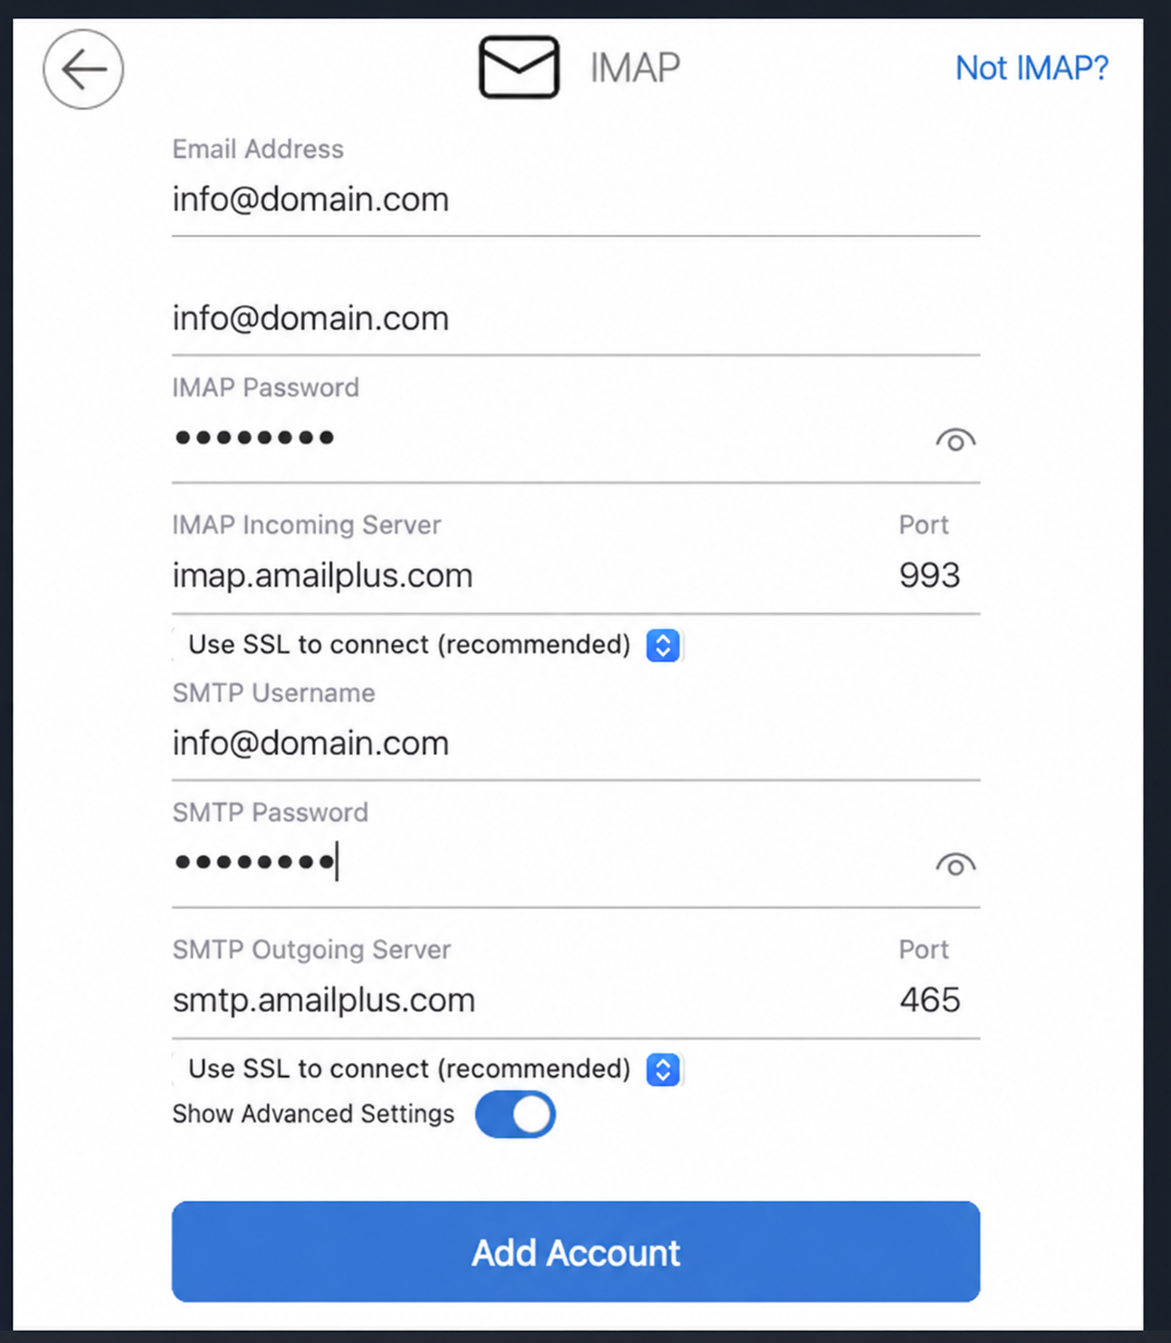
Complete the fields below. Use your full email address for both usernames and your mailbox password for both password fields.
Incoming Mail Server (IMAP)
| Field | Value |
|---|---|
| Server name | imap.amailplus.com |
| Port | 993 |
| Encryption | SSL/TLS (Use SSL to connect) |
| IMAP username | Your full email address, for example [email protected] |
| Password | Your mailbox password |
Outgoing Mail Server (SMTP)
| Field | Value |
|---|---|
| Server name | smtp.amailplus.com |
| Port | 465 |
| Encryption | SSL/TLS (Use SSL to connect) |
| SMTP username | Your full email address, for example [email protected] |
| Password | Your mailbox password |
| Authentication | Required; use the same credentials as incoming mail |
Alternative SMTP setting: You can use port 587 with STARTTLS. Match the encryption to the port: 465 with SSL/TLS, or 587 with STARTTLS.
Check the encryption selected for both servers, then select Add Account.
Step 7: Finish setup
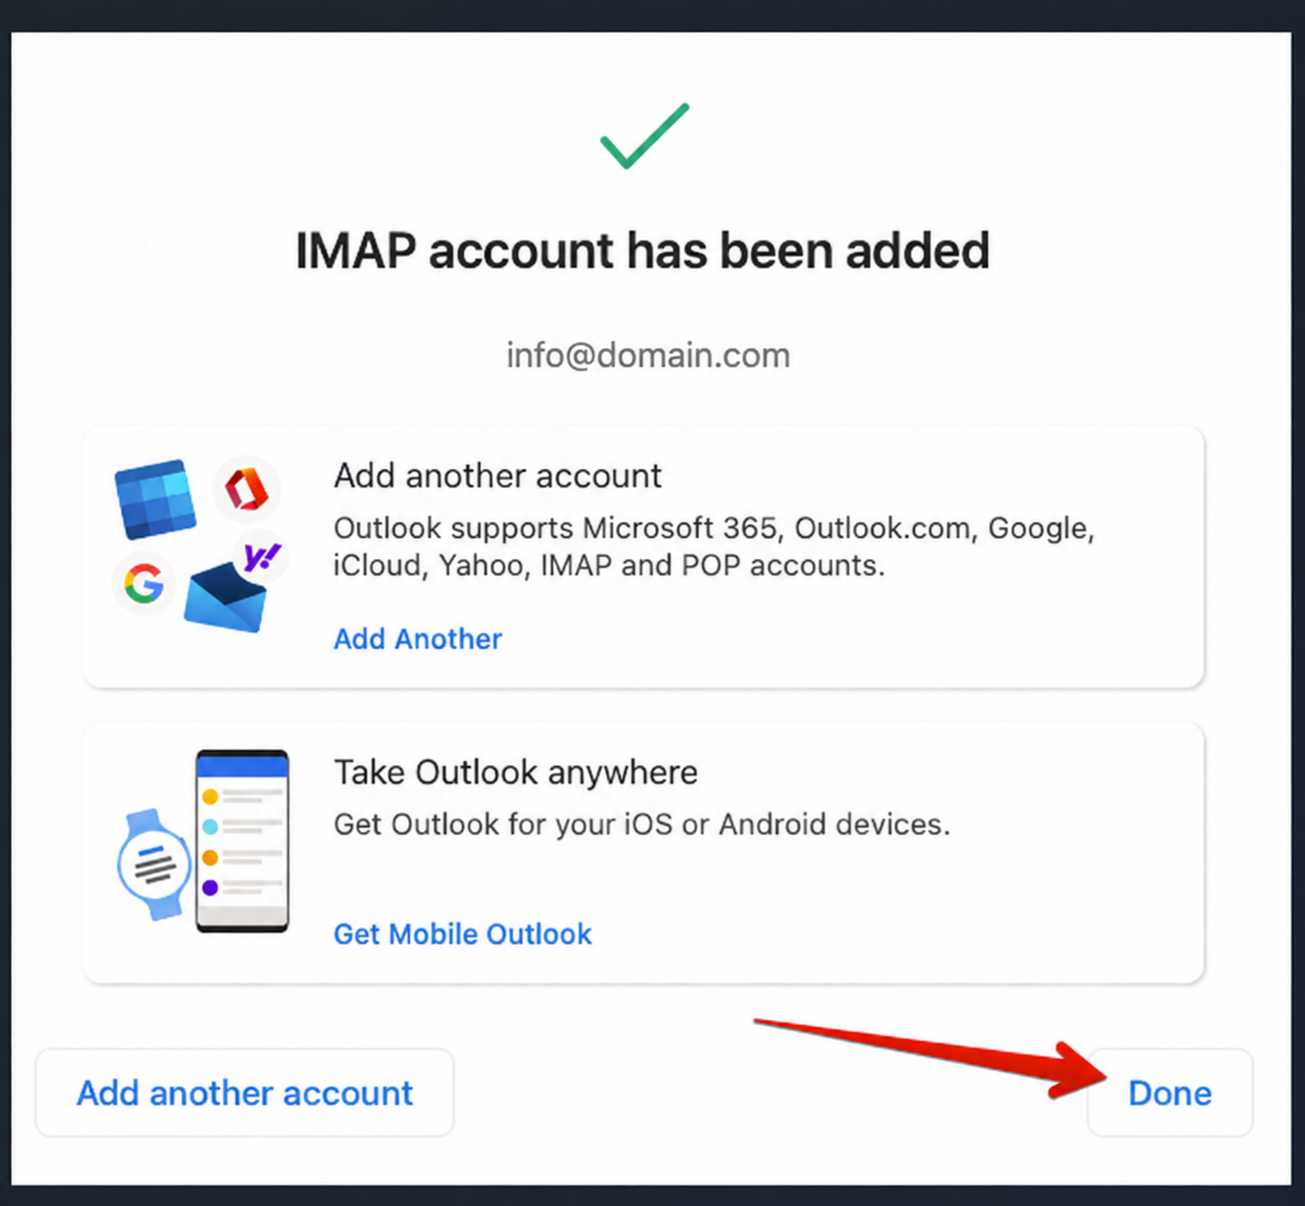
When Outlook confirms that the IMAP account has been added, select Done. Allow the mailbox to sync, then send and receive a test email to check the connection.
Need help?
If the connection fails, check your full email address, mailbox password, server names, ports and encryption settings. You can also test your credentials at AmailPlus Webmail. Contact Aveshost Support if you need assistance.
