


Once an SSL certificate is installed on your domain, your website becomes accessible over secure HTTPS (https://yourdomain.com). However, if a visitor types your domain into their browser without specifying https://, or clicks an old link, web browsers will by default load the unencrypted HTTP version (http://yourdomain.com), displaying an alarming "Not Secure" warning.
To ensure that all website visitors, login credentials, and transactions are always protected, you need to force an automatic 301 redirect from HTTP to HTTPS. In this comprehensive guide, we will cover the primary methods to force HTTPS in DirectAdmin, including DirectAdmin's built-in 1-click redirect, .htaccess rewrite rules, and CMS/WordPress settings.
Prerequisites
- An active Web Hosting account with DirectAdmin.
- An active SSL/TLS certificate installed on your domain (if you haven't installed one yet, follow our guide on How to Install an SSL Certificate in DirectAdmin).
- Your domain pointed to Aveshost nameservers (see Where to find Aveshost nameservers).
- Access to your DirectAdmin control panel (see How to Login to DirectAdmin Control Panel).
Method 1: Force HTTPS via DirectAdmin Built-In Setting (Recommended)
DirectAdmin provides a native, server-level toggle that automatically redirects all incoming unencrypted HTTP requests to secure HTTPS without requiring you to write any code.
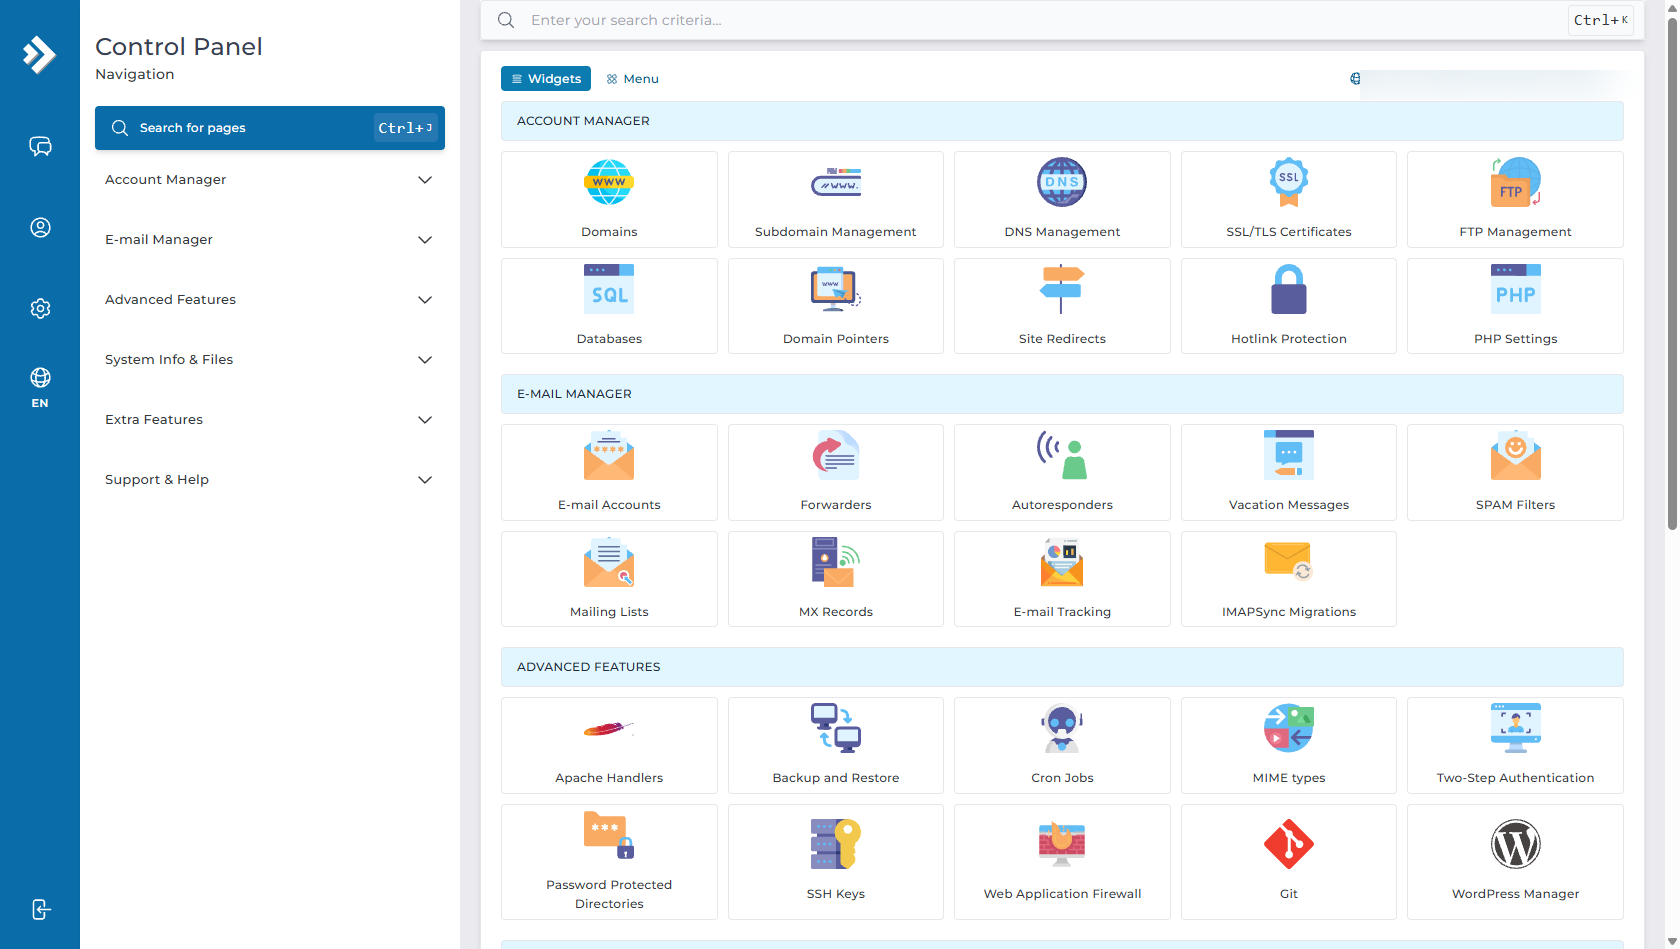
Step 1: Navigate to Domains in Account Manager
Log in to your DirectAdmin dashboard. In the left navigation menu under Account Manager, click on Domains.
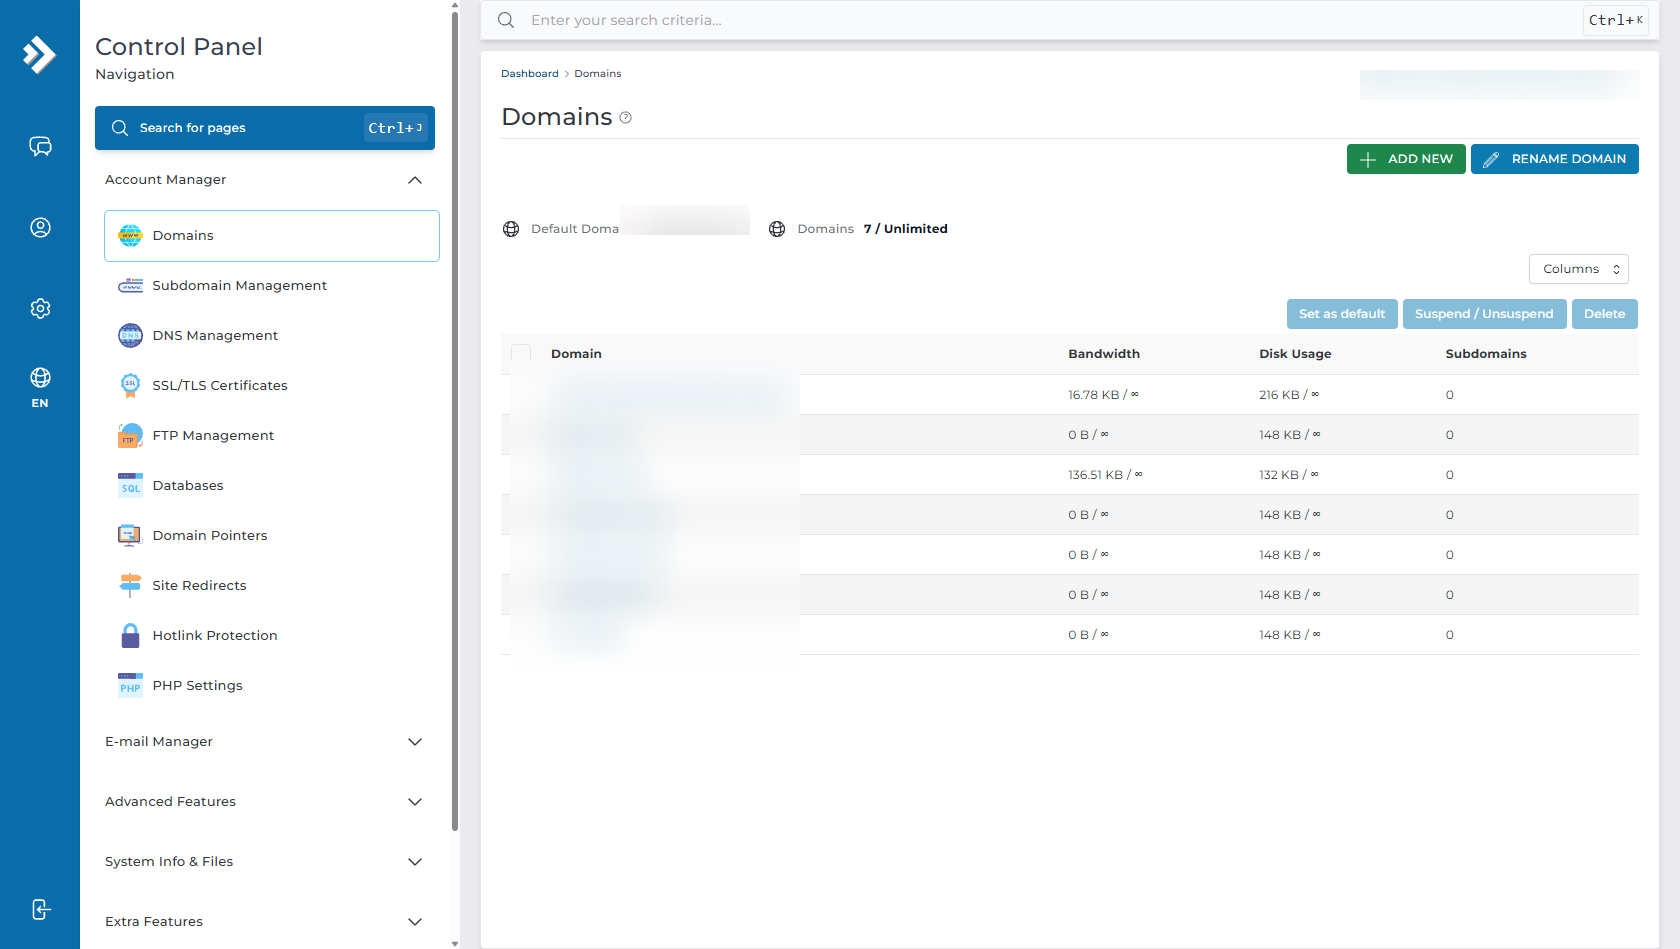
Step 2: Select Your Domain
On the Domains overview page, click on the domain name you wish to configure.
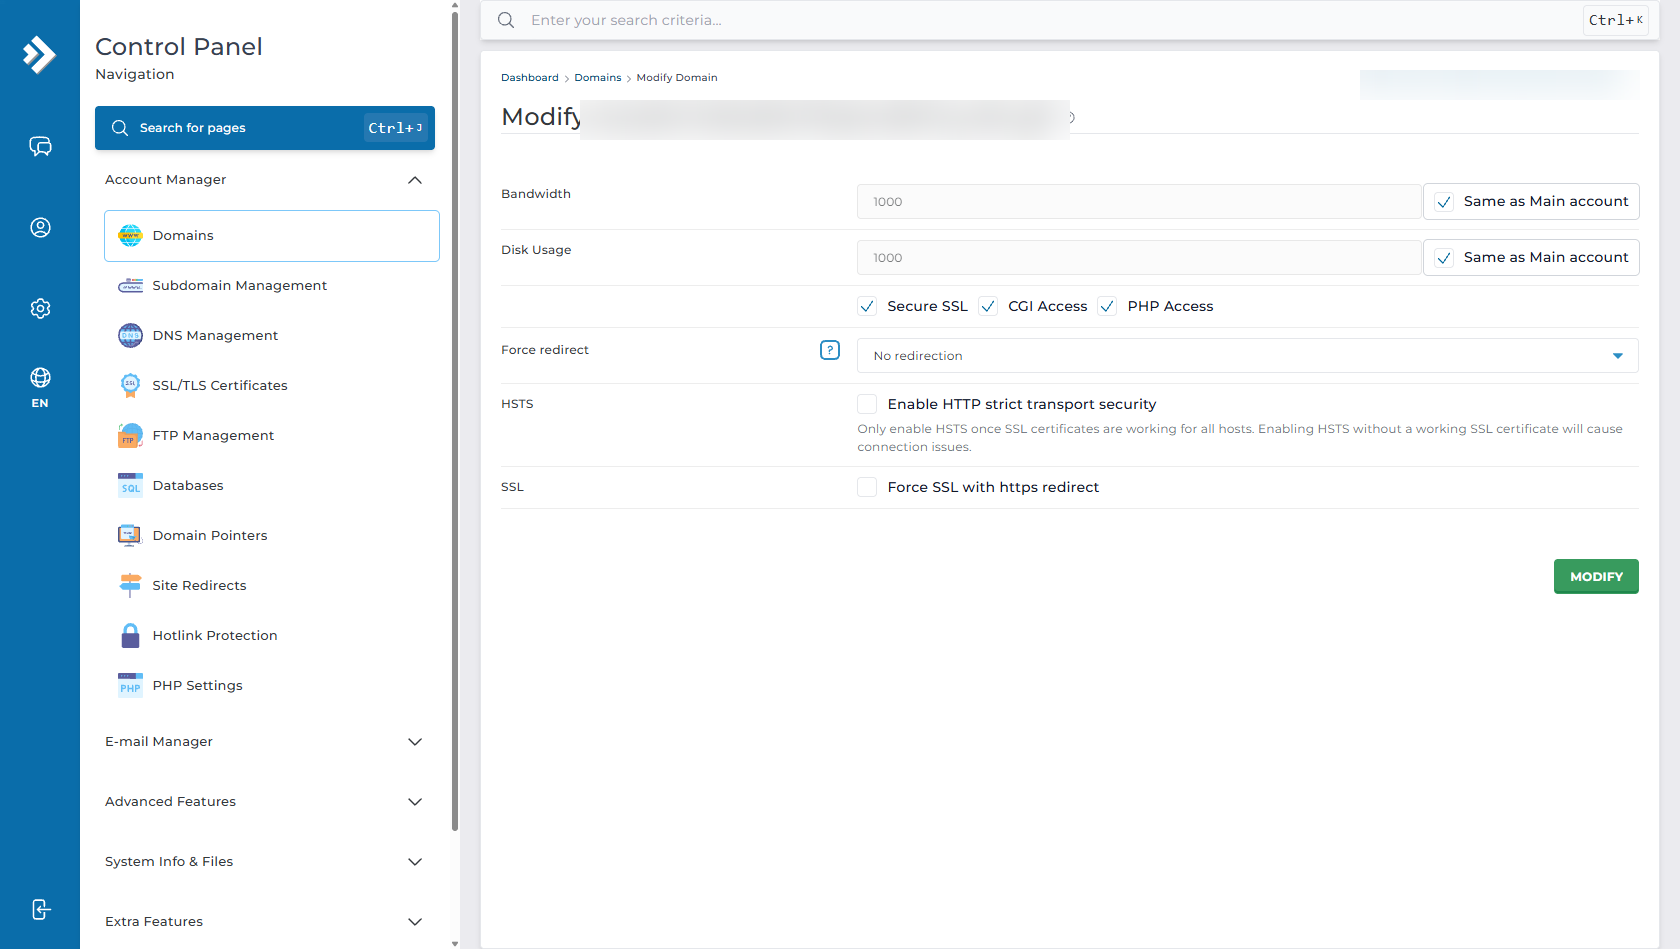
Step 3: Enable "Force SSL with https redirect"
On the Modify Domain configuration page:
- Ensure that the Secure SSL checkbox is checked.
- Locate the Force redirect or SSL section and check/select "Force SSL with https redirect".
- (Optional) Enable HTTP Strict Transport Security (HSTS): Check this option if you want modern browsers to strictly enforce HTTPS for your domain at all times. (Only enable HSTS after confirming that your SSL certificate is working properly).
- Click the green MODIFY button at the bottom right to apply the changes.
Method 2: Force HTTPS Using the .htaccess File
If you prefer configuring server redirect rules manually or need custom redirection behavior, you can add 301 redirect directives to your website's .htaccess file.
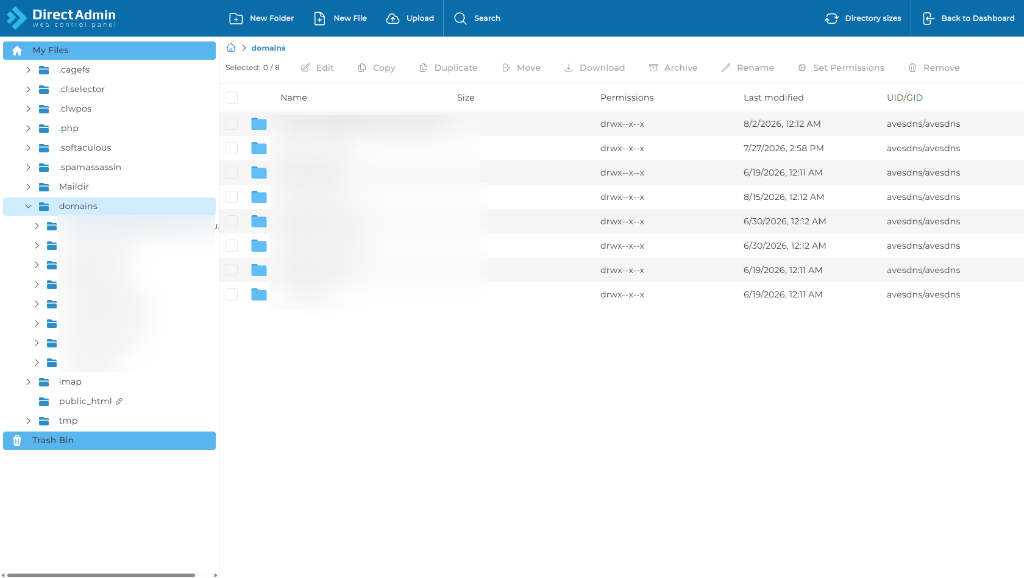
Step 1: Open DirectAdmin File Manager
Go to System Info & Files > File Manager, and navigate to your website's document root folder:
domains/yourdomain.com/public_html/
Step 2: Edit or Create .htaccess
- Locate the
.htaccessfile (if it is hidden, ensure Show Hidden Files is enabled in File Manager, or create a new file named.htaccess). - Click Edit File.
- Add the following code at the very top of your
.htaccessfile:
RewriteEngine On
RewriteCond %{HTTPS} off
RewriteRule ^(.*)$ https://%{HTTP_HOST}%{REQUEST_URI} [L,R=301]
Step 3: Save Changes
Click Save in File Manager. All HTTP requests will immediately be issued a 301 Permanent Redirect to HTTPS.
Method 3: Updating WordPress & CMS URL Settings
If your website runs on WordPress or another CMS, you should also update your site URLs to avoid mixed content warnings or internal redirect chains:
- Log in to your WordPress admin dashboard (
yourdomain.com/wp-admin). - Navigate to Settings > General.
- Update both WordPress Address (URL) and Site Address (URL) from
http://tohttps://(e.g.,https://yourdomain.com). - Scroll down and click Save Changes.
Tip: You can also use plugins like Really Simple SSL to automatically configure redirects and fix insecure script/image references across your site.
How to Test & Verify Your HTTPS Redirect
- Browser Incognito Test: Open a private or incognito browsing window, type
http://yourdomain.com(explicitly withhttp://), and press Enter. It should instantly redirect tohttps://yourdomain.comwith a secure padlock. - Check HTTP Headers (cURL): In your command prompt or terminal, run:
curl -IL http://yourdomain.com
You should see a response header ofHTTP/1.1 301 Moved Permanentlypointing to thehttps://location.
Frequently Asked Questions & Troubleshooting
Q: My site shows "ERR_TOO_MANY_REDIRECTS" (Redirect Loop) after enabling Force SSL. How do I fix it?
A: This typically occurs when:
- Cloudflare / Proxy SSL mismatch: If you use Cloudflare, make sure your Cloudflare SSL/TLS encryption mode is set to Full or Full (strict) rather than Flexible.
- Conflicting plugins/rules: You may have competing redirect rules in both DirectAdmin and a WordPress redirection plugin. Disable one of the rules to eliminate the loop.
Q: Why does my browser still display "Not Secure" or a warning icon even after redirecting to HTTPS?
A: This is caused by Mixed Content, meaning your webpage is served over HTTPS but is loading images, CSS, or scripts using hardcoded http:// URLs. In WordPress, use a search-and-replace tool (or plugins like Better Search Replace or Really Simple SSL) to update all internal asset URLs to https://.
Q: What is the difference between "Force SSL" and "HSTS"?
A: Force SSL sends a standard 301 redirect instruction from the server whenever someone visits via HTTP. HSTS (HTTP Strict Transport Security) instructs the visitor's browser to never attempt connecting via HTTP in the first place, completely blocking downgrade attacks and man-in-the-middle exploits.
Need Further Assistance?
If you encounter any issues setting up HTTPS redirects or configuring SSL in DirectAdmin, our 24/7 technical support team is ready to assist you. Feel free to submit a support ticket through your client area.
