


Next.js is the leading React framework for building production-grade web applications, powering modern eCommerce stores, marketing sites, SaaS dashboards, and full-stack web platforms. Next.js offers two primary deployment strategies that run seamlessly on DirectAdmin hosting:
- Method 1: Static HTML Export (
output: 'export') — Recommended for most websites: Compiles your Next.js application into lightning-fast static assets (HTML, CSS, JS chunks) served directly by DirectAdmin’s high-performance Apache or LiteSpeed web server without any background Node.js process overhead. - Method 2: Node.js SSR Application (DirectAdmin Setup Node.js App): Runs Next.js as a live Node.js daemon using DirectAdmin’s built-in application manager for projects requiring Server-Side Rendering (SSR), Server Actions, dynamic API routes (
/api/*), or server middleware.
In this comprehensive guide, we will cover both deployment methods step-by-step, including configuration files, build commands, DirectAdmin File Manager / Node.js manager walkthroughs, and critical .htaccess routing rules.
Prerequisites
- An active Web Hosting account with DirectAdmin.
- A domain name added to DirectAdmin (see How to Add a Domain Name in DirectAdmin) or a subdomain (see How to Create a Subdomain in DirectAdmin).
- Your domain pointed to Aveshost nameservers (refer to Where to find Aveshost nameservers).
- An active SSL certificate installed and HTTPS enforced (see How to Install an SSL Certificate in DirectAdmin and How to Force HTTP to HTTPS in DirectAdmin).
- Access to your DirectAdmin control panel (see How to Login to DirectAdmin Control Panel).
- A local Node.js / npm environment on your computer where your Next.js application is developed.
Method 1: Deploying Next.js as a Static Export (Recommended)
Static Export is the most popular, reliable, and cost-effective way to host Next.js websites on DirectAdmin shared and cloud hosting. It provides maximum speed, high security, and minimal server resource usage.
Step 1: Configure next.config.js or next.config.mjs
Open your Next.js project locally and update your configuration file (next.config.js or next.config.mjs) to enable static exports and unoptimized images:
/** @type {import('next').NextConfig} */
const nextConfig = {
  output: 'export',
  images: {
    unoptimized: true,
  },
  trailingSlash: true,
};

module.exports = nextConfig;
Note: Setting trailingSlash: true generates structured directories (e.g., /about/index.html) making clean URL navigation work effortlessly on Apache web servers.
Step 2: Generate the Production Build Locally
- In your project terminal, execute the build command:
npm run build # OR if using yarn / pnpm: yarn build pnpm build - Next.js will generate a static production folder named
out/in your project root. - Open the
out/directory, select all the files and folders inside it (such asindex.html,_next/,404.html,favicon.ico), and compress them into a.ziparchive (e.g.,nextjs-build.zip).
Important: Zip the contents INSIDE theout/folder, not the parentout/folder itself.
Step 3: Access DirectAdmin File Manager
- Log in to your DirectAdmin control panel.
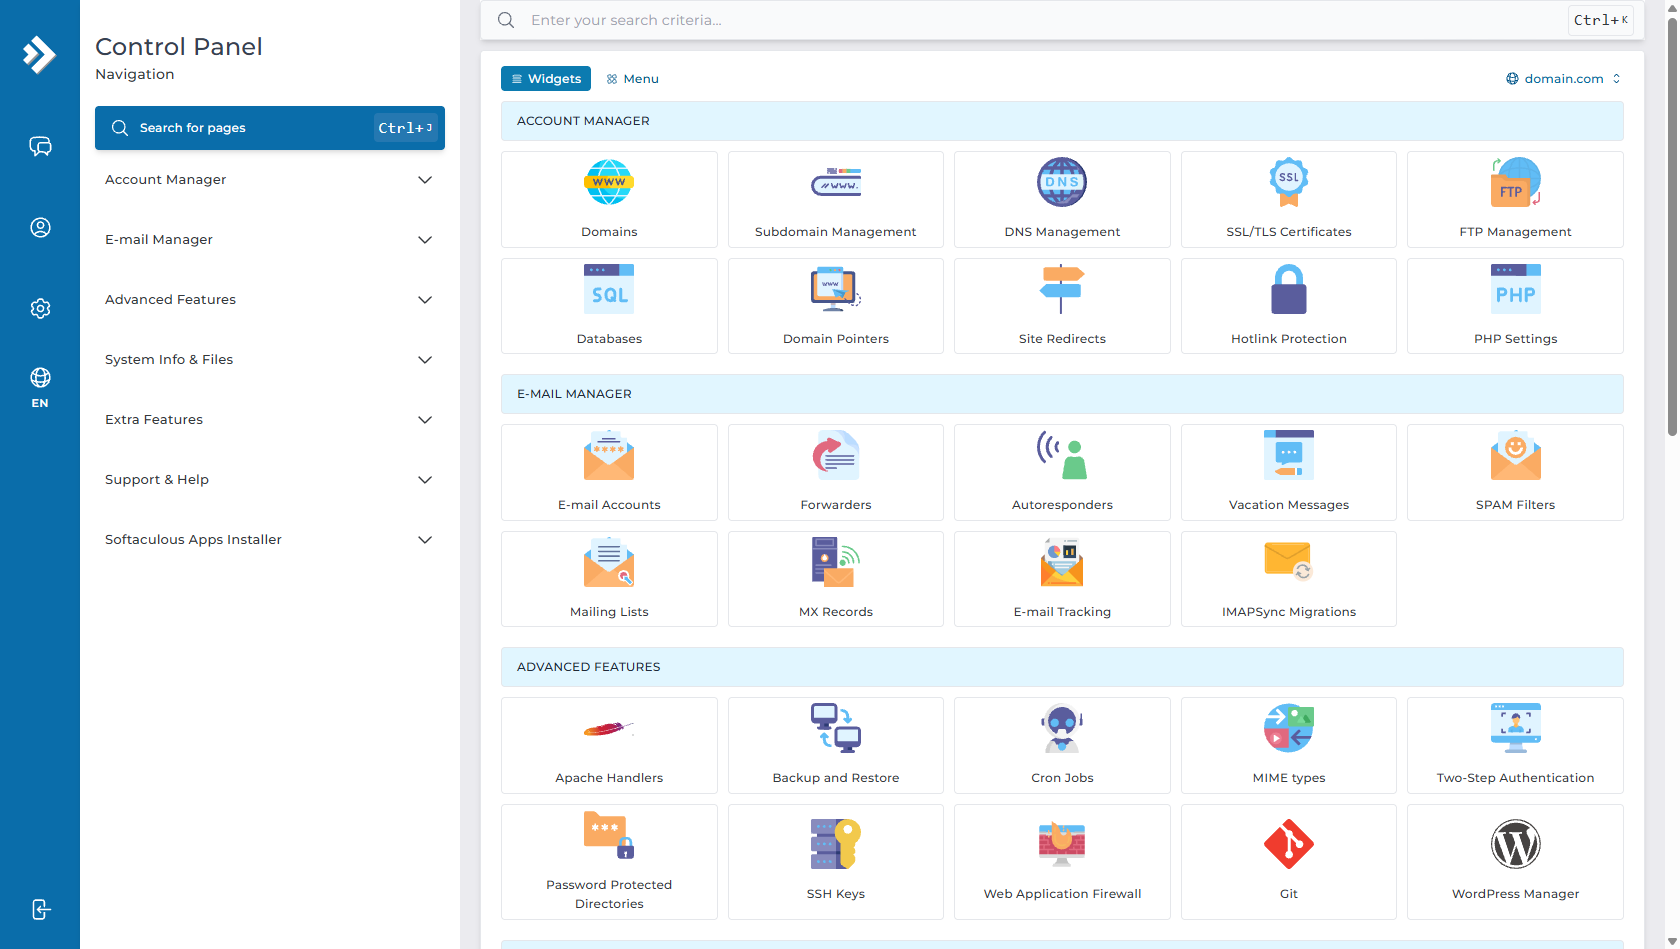
- Under System Info & Files, click on File Manager.
Step 4: Upload and Extract Your Next.js Build
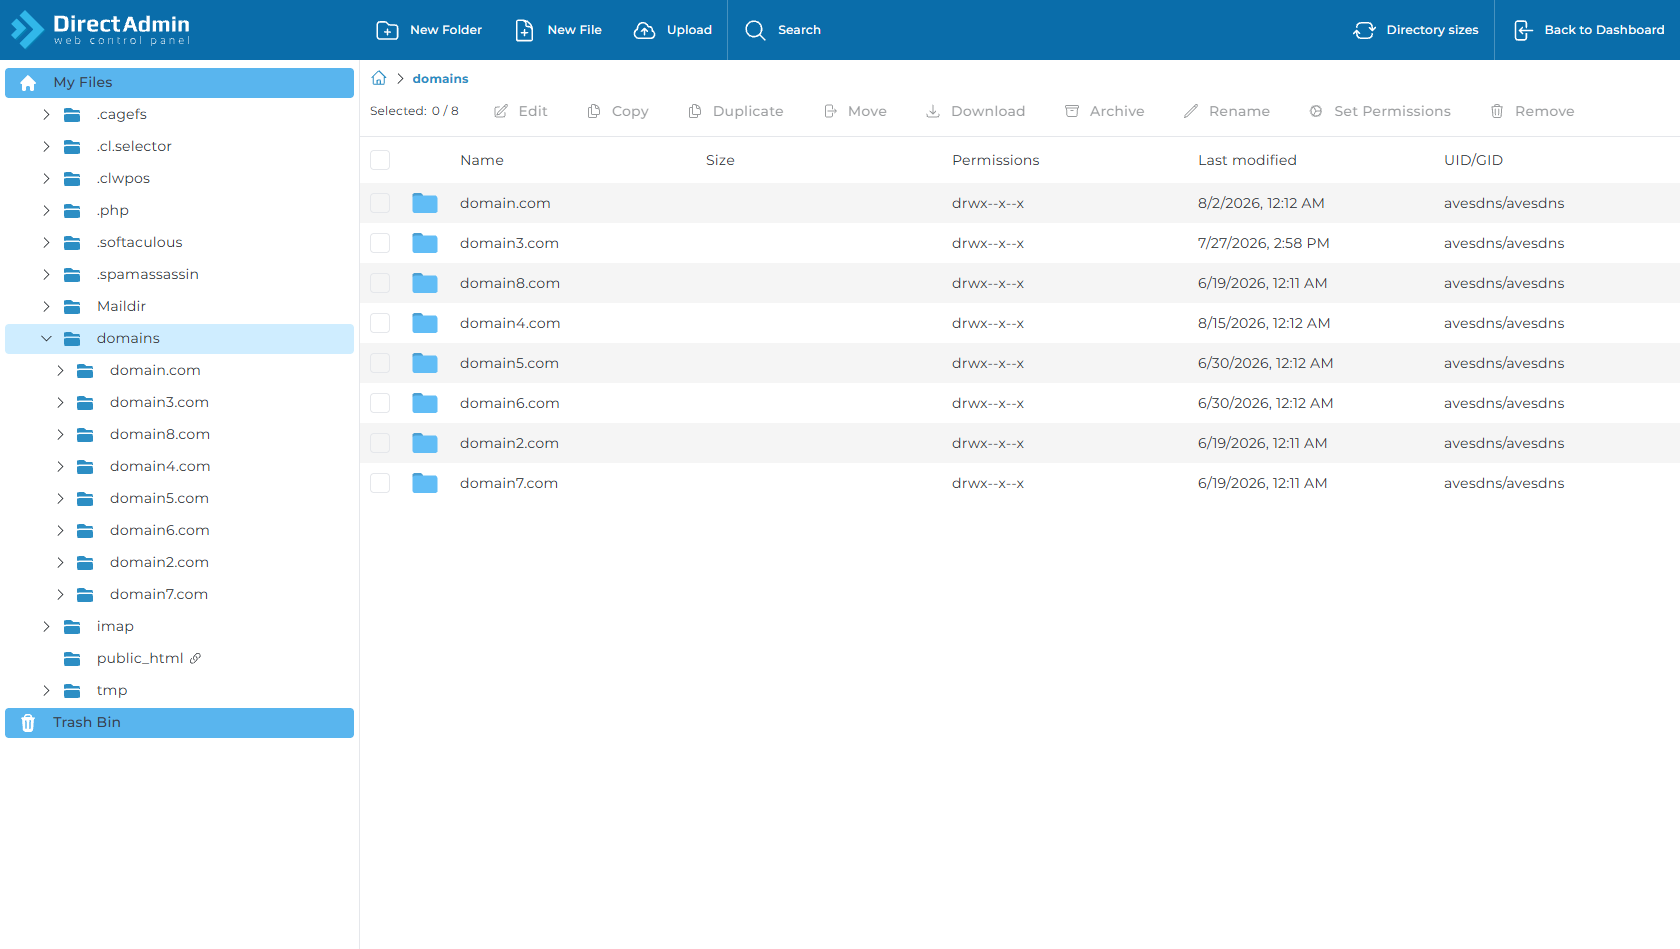
- In File Manager, navigate to your domain’s document root:
domains > domain.com > public_html - Delete any default placeholder files (like the default
index.html). - Click Upload in the top menu and select your
nextjs-build.ziparchive. - Once uploaded, right-click the archive and click Extract. Ensure that
index.htmland the_next/folder sit directly insidepublic_html.
Step 5: Configure .htaccess for Next.js Clean URLs
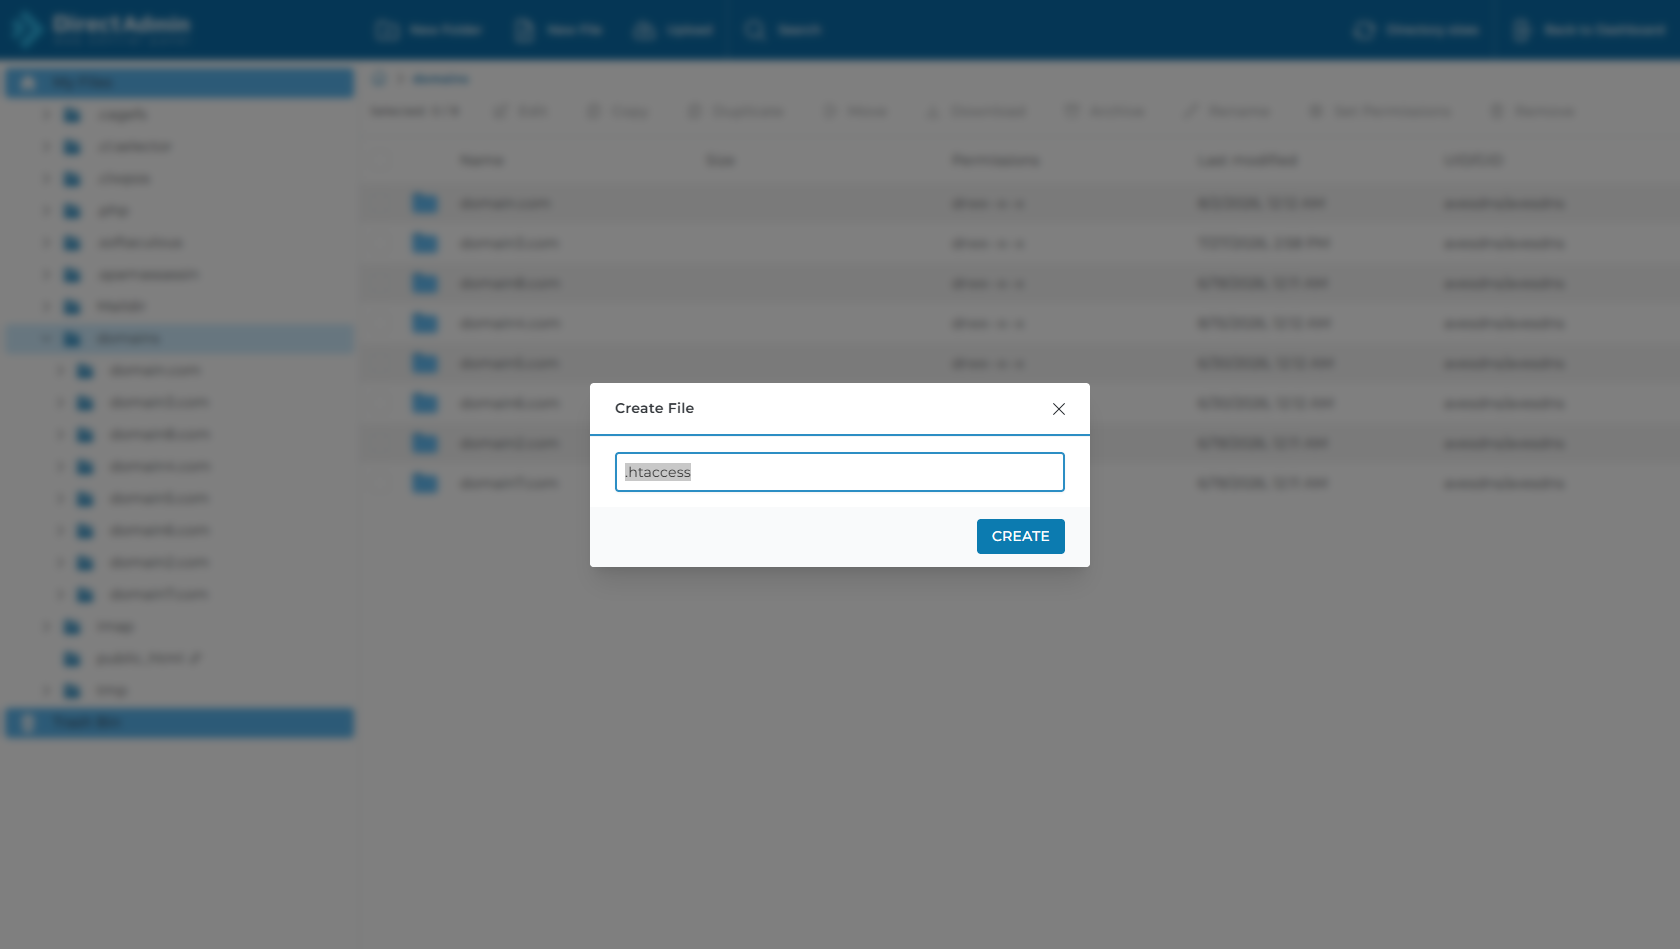
- Inside
public_html, click + New File, name the file.htaccess, and click Create. - Click Edit on the
.htaccessfile and paste the following rewrite configuration:<IfModule mod_rewrite.c> RewriteEngine On RewriteBase / # Serve existing files and directories directly RewriteCond %{REQUEST_FILENAME} -f [OR] RewriteCond %{REQUEST_FILENAME} -d RewriteRule ^ - [L] # Serve matching .html files for clean URLs (e.g. /about -> /about.html) RewriteCond %{DOCUMENT_ROOT}/$1.html -f RewriteRule ^(.*)$ $1.html [L] # Custom 404 handler ErrorDocument 404 /404.html </IfModule> - Click Save.
Method 2: Deploying Next.js as a Node.js SSR Application
If your Next.js project requires live Server-Side Rendering (getServerSideProps), API Routes (/api/*), or Server Actions, you can run it as a Node.js application in DirectAdmin:
Step 1: Configure Custom Server or Standalone Output
In your next.config.js, configure standalone output:
/** @type {import('next').NextConfig} */
const nextConfig = {
  output: 'standalone',
};

module.exports = nextConfig;
Step 2: Access "Setup Node.js App" in DirectAdmin
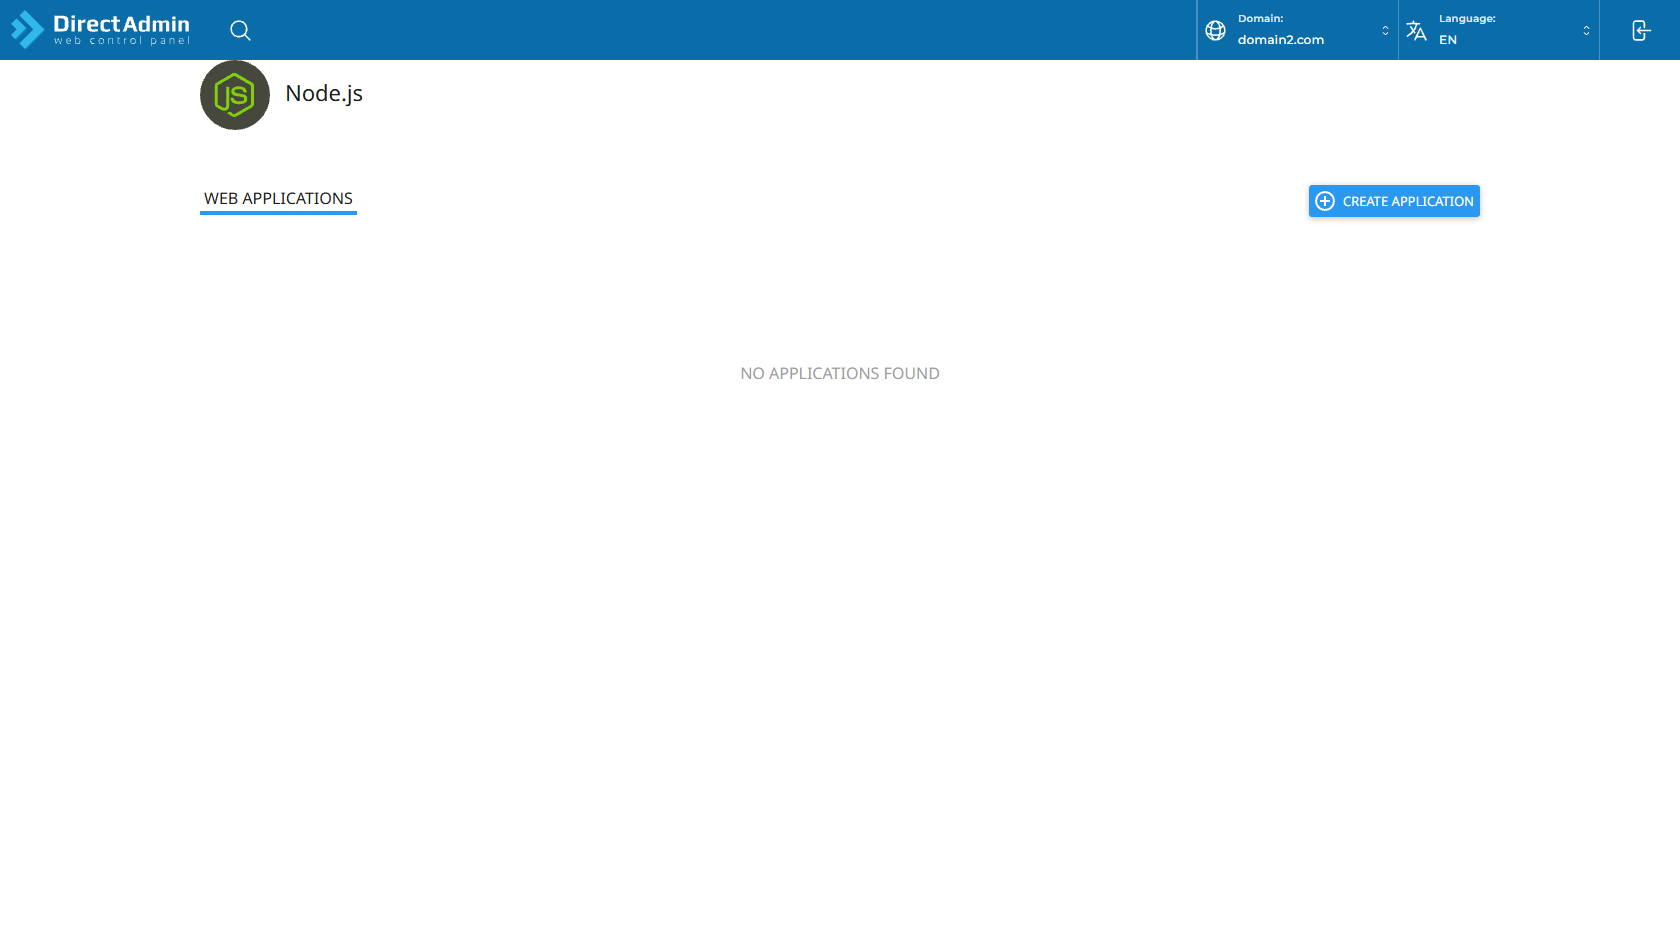
- In the DirectAdmin dashboard, navigate to Extra Features > Setup Node.js App.
- Click the + CREATE APPLICATION button in the top right corner.
Step 3: Configure the Application Settings
| Setting | Recommended Value | Description |
|---|---|---|
| Node.js Version | 18.x or 20.x |
Select the LTS version matching your local environment. |
| Application Mode | Production |
Optimizes memory and performance for live traffic. |
| Application Root | nextjs-app |
The folder where your Next.js project files are located. |
| Application URL | domain.com |
Select your target domain name from the dropdown. |
| Application Startup File | server.js |
The entry point script that boots your Next.js server. |
Step 4: Upload Project Files & Install Dependencies
- In File Manager, navigate to the Application Root folder (e.g.,
/home/username/nextjs-app). - Upload your
package.json,next.config.js,.next/build directory,public/folder, andserver.js. - Return to Setup Node.js App in DirectAdmin and click Run NPM Install to install production packages.
- Click Start Application (or Restart) to launch your live Next.js SSR server.
Performance Optimizations & Best Practices
1. Production Environment Variables
Create a .env.production file locally before building to define client and server environment variables:
NEXT_PUBLIC_SITE_URL=https://domain.com
NEXT_PUBLIC_API_URL=https://api.domain.com
DATABASE_URL=your_database_connection_string
2. Aggressive Caching for Next.js Static Chunks
Next.js automatically hashes all static assets inside _next/static/. You can configure high-performance caching in your .htaccess file to maximize loading speed and reduce server bandwidth:
<IfModule mod_expires.c>
  ExpiresActive On
  ExpiresByType image/webp "access plus 1 year"
  ExpiresByType image/svg+xml "access plus 1 year"
  ExpiresByType text/css "access plus 1 year"
  ExpiresByType application/javascript "access plus 1 year"
</IfModule>
Frequently Asked Questions & Troubleshooting
Q: Why does npm run build show an error about Image Optimization with static export?
A: The default Next.js next/image component uses an on-demand image optimization server that requires Node.js runtime. When using output: 'export', you must add images: { unoptimized: true } in your next.config.js file.
Q: Why do direct subpage URLs return 404 errors?
A: If you deployed via Static Export without trailingSlash: true or missing .htaccess rules, the web server cannot map URL paths to .html files. Ensure you have the .htaccess rewrite rule from Step 5 saved inside public_html.
Q: Which method should I choose for my project?
A: For 90% of Next.js projects (blogs, portfolios, landing pages, documentation, and client-rendered apps fetching from external APIs), Method 1 (Static Export) is the fastest and easiest. Choose Method 2 (Node.js App) only if you strictly require Server Actions, on-demand SSR, or Next.js server API routes.
Need Further Assistance?
If you have any questions or need help deploying your Next.js project on DirectAdmin, our support team is available 24/7. Simply submit a support ticket through your client area for prompt assistance.
