


Laravel is the world’s most popular PHP web application framework, renowned for its elegant syntax, Model-View-Controller (MVC) architecture, Eloquent ORM, robust routing, and powerful ecosystem. Deploying a Laravel application to DirectAdmin web hosting is secure, performant, and straightforward when following proper directory structuring and environment configuration.
Because Laravel uses a security-first architecture where only the public/ folder should be accessible to the internet, DirectAdmin allows you to securely place your core framework files (such as app/, config/, vendor/, and .env) outside the public web root while routing web traffic seamlessly to public/index.php.
In this comprehensive step-by-step tutorial, we will guide you through preparing, uploading, and configuring your Laravel project in DirectAdmin, including MySQL database creation, .env configuration, .htaccess web root routing, file permissions, and task scheduling (Cron Jobs).
Prerequisites
- An active Web Hosting account with DirectAdmin.
- A domain name configured in DirectAdmin (see How to Add a Domain Name in DirectAdmin) or a subdomain (see How to Create a Subdomain in DirectAdmin).
- Your domain pointed to Aveshost nameservers (refer to Where to find Aveshost nameservers).
- An active SSL certificate installed and HTTPS enforced (see How to Install an SSL Certificate in DirectAdmin and How to Force HTTP to HTTPS in DirectAdmin).
- Access to your DirectAdmin control panel (see How to Login to DirectAdmin Control Panel).
- A local development computer with PHP 8.2+, Composer, and Node.js installed.
Step-by-Step Guide: How to Deploy Laravel in DirectAdmin
Step 1: Prepare the Laravel Project Locally
Before uploading to DirectAdmin, optimize your dependencies and compile frontend assets locally:
- Open your terminal in your local Laravel project directory.
- Install production PHP dependencies and generate an optimized class map:
composer install --optimize-autoloader --no-dev - Compile your frontend assets (CSS / JavaScript) using Vite:
npm run build - Compress project files into a ZIP archive: Select all project files and folders (including
app/,bootstrap/,config/,database/,public/,resources/,routes/,storage/,vendor/,artisan, andcomposer.json), and compress them intolaravel-app.zip.
Note: Do not include thenode_modules/folder or.git/directory in the zip archive to keep the file lightweight.
Step 2: Create a MySQL Database in DirectAdmin
- Log in to your DirectAdmin control panel.
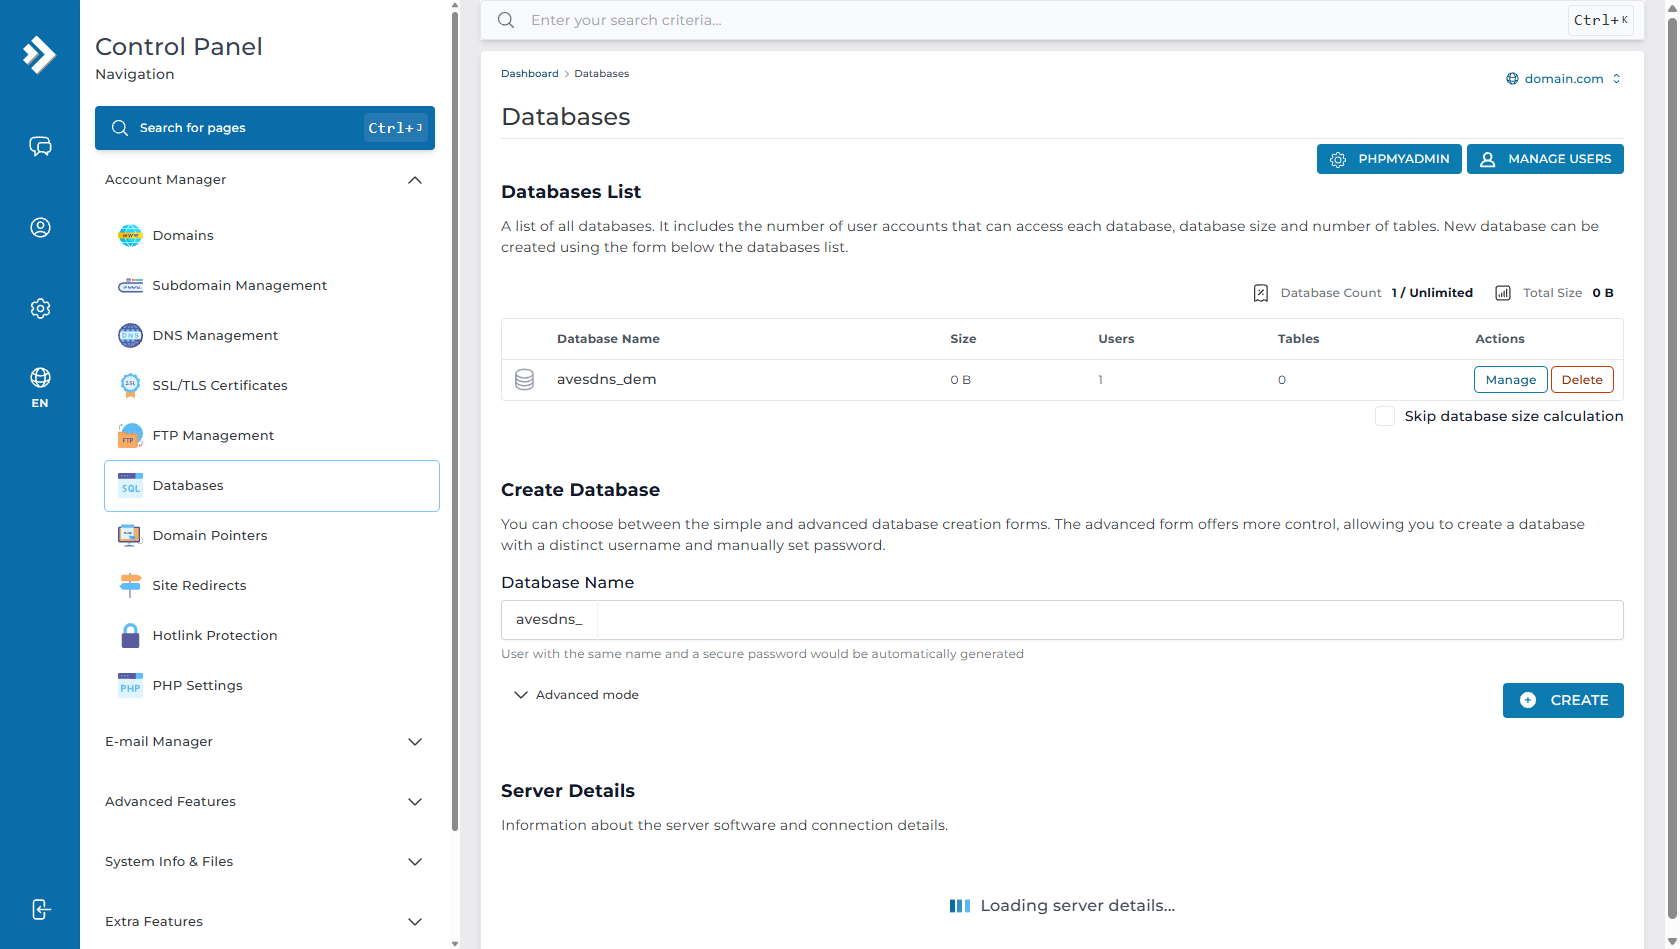
- Under Account Manager, click on Databases.
- Click the Create Database section.
- Enter a Database Name (e.g.
laravel_db) and Database Username. - Generate or enter a strong password, then click CREATE.
- Take note of your Full Database Name, Full Username, and Password for the next steps.
Step 3: Access File Manager & Upload the Laravel Archive
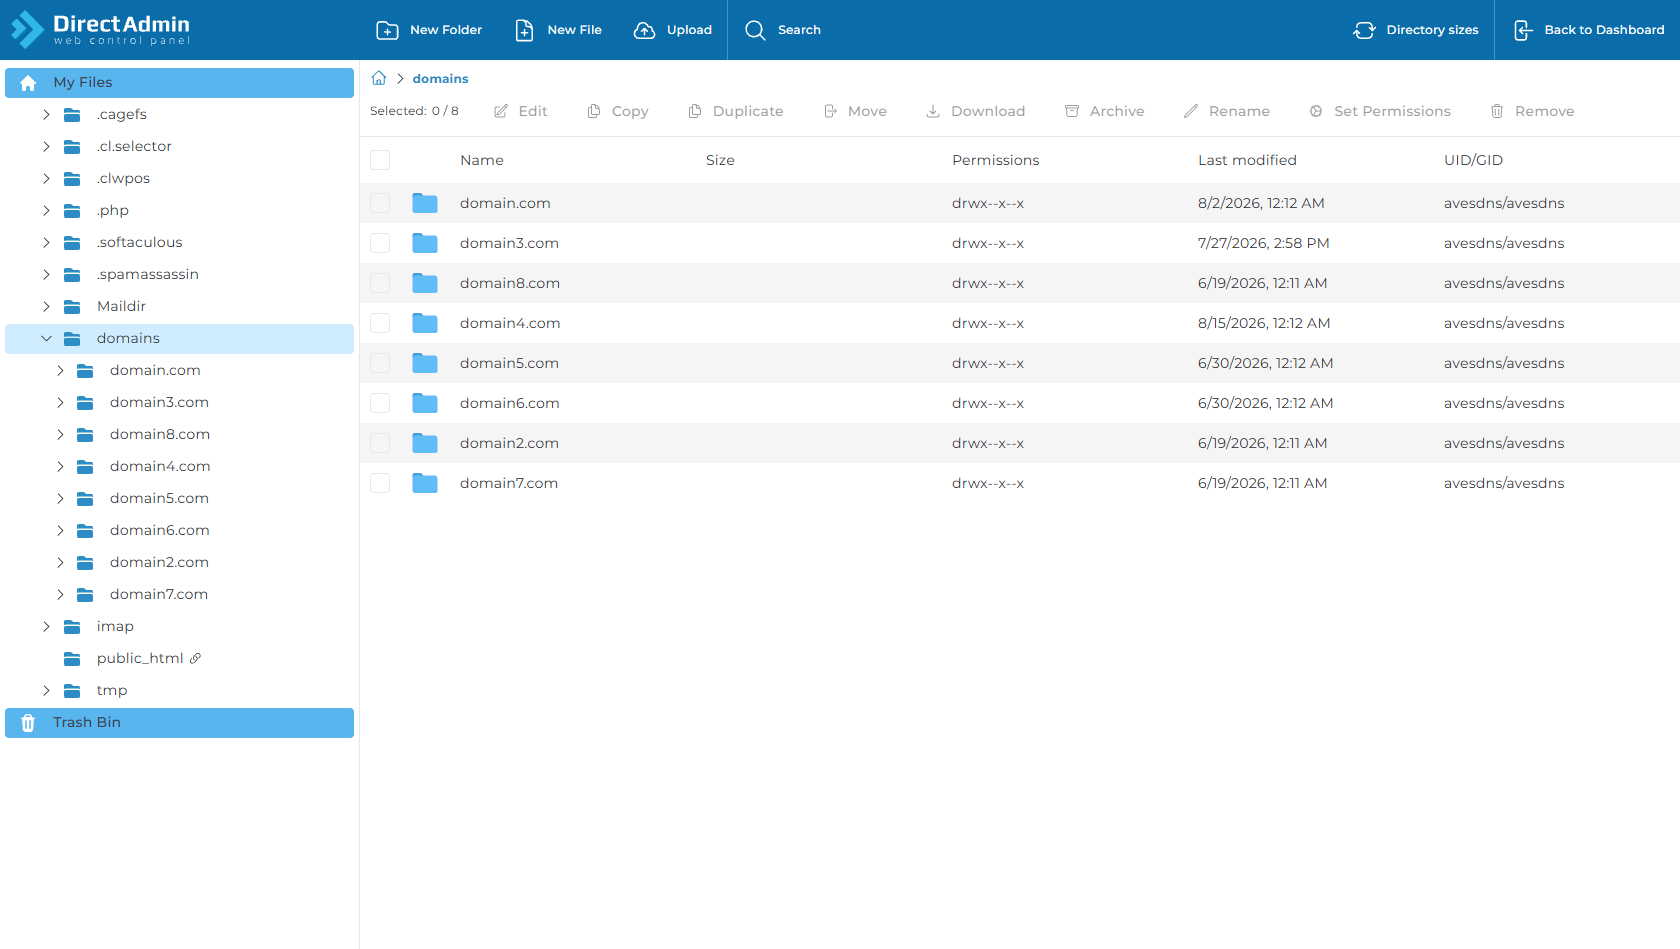
- In DirectAdmin, navigate to System Info & Files > File Manager.
- Navigate to your domain directory:
domains > domain.com - Click New Folder and create a directory named
laravelalongsidepublic_html. - Open the newly created
laraveldirectory, click Upload in the top navigation bar, and upload yourlaravel-app.zipfile. - Right-click
laravel-app.zipand select Extract.
Step 4: Configure Document Root Routing in public_html
CRITICAL STEP FOR LARAVEL SECURITY: In Laravel, all incoming HTTP requests must hit laravel/public/index.php while keeping configuration and environment files private. To route web traffic from public_html to Laravel's public directory seamlessly:
- In File Manager, navigate to
domains > domain.com > public_html. - Delete any default placeholder files (such as a default
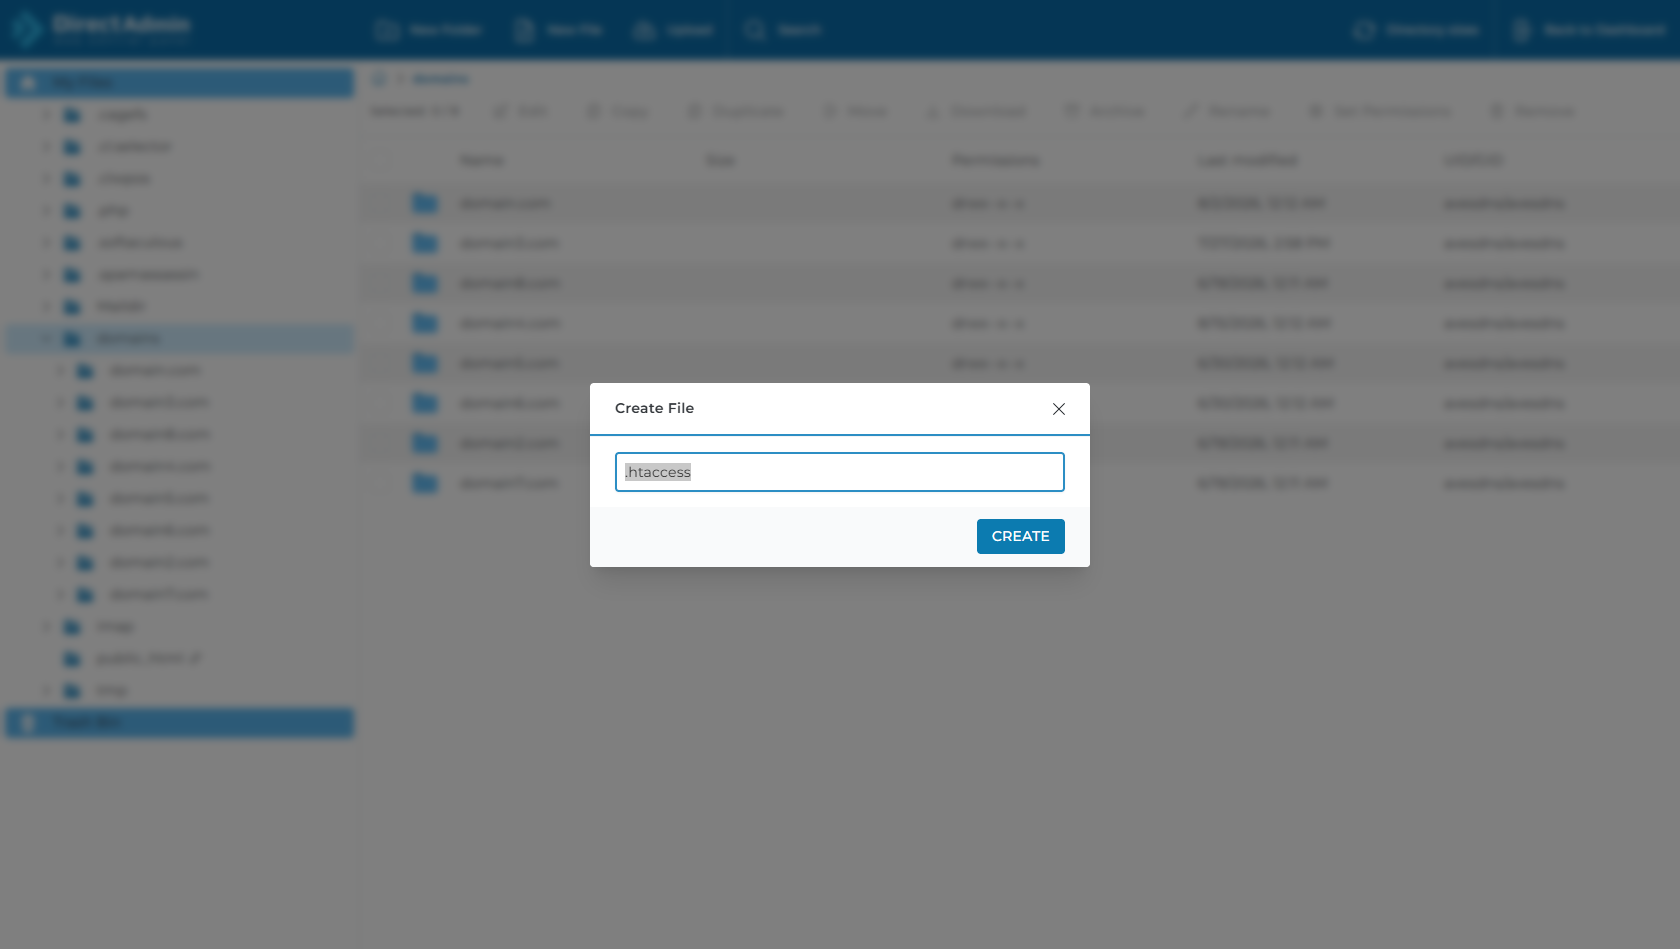
index.html). - Click + New File, enter
.htaccessas the filename, and click Create. - Select
.htaccess, click Edit, and paste the following proxy rewrite rules:<IfModule mod_rewrite.c> RewriteEngine On RewriteRule ^(.*)$ ../laravel/public/$1 [L] </IfModule> - Click Save.
Step 5: Configure the Production .env File
- In File Manager, navigate to
domains > domain.com > laravel. - If
.envdoes not exist, rename.env.exampleto.env(or create a new.envfile). - Edit the
.envfile and update your production environment values and database credentials:APP_NAME="MyLaravelApp" APP_ENV=production APP_KEY=base64:YOUR_APP_KEY_FROM_LOCAL_ENV APP_DEBUG=false APP_URL=https://domain.com DB_CONNECTION=mysql DB_HOST=127.0.0.1 DB_PORT=3306 DB_DATABASE=avesdns_laravel_db DB_USERNAME=avesdns_laravel_user DB_PASSWORD=YOUR_STRONG_PASSWORD - Click Save.
Step 6: Set Directory Permissions for Storage and Cache
Laravel requires write permissions for session storage, compiled views, file uploads, and system logs:
- In File Manager under
domains > domain.com > laravel, locate the following folders:storage/(includingstorage/app,storage/framework,storage/logs)bootstrap/cache/
- Right-click each folder, select Set Permissions, and set permissions to
775(or755). Check the box to apply recursively if available.
Step 7: Import Database Schema & Optimize Caches
- Import Database: In DirectAdmin under Account Manager > Databases, click PHPMYADMIN. Select your created database, click the Import tab, and upload your local
.sqldatabase dump. - Optimize Caches: If you have SSH / Terminal access in DirectAdmin, run the optimization commands:
php artisan config:cache
php artisan route:cache
php artisan view:cache
Step 8: Test and Verify Your Live Laravel Website
- Open your web browser and visit
https://domain.com. - Your Laravel web application should load with all styles, database connections, and routes operational!
Automating Laravel Task Scheduling (Cron Jobs)
Laravel includes a built-in Task Scheduler (php artisan schedule:run). To enable automatic background jobs, scheduled tasks, and queue monitoring:
- In DirectAdmin, navigate to Advanced Features > Cron Jobs.
- Click Create Cron Job.
- Set the interval to Every Minute (
* * * * *). - In the Command field, enter:
(Replace* * * * * cd /home/username/domains/domain.com/laravel && php artisan schedule:run >> /dev/null 2>&1usernameanddomain.comwith your actual account username and domain). - Click SAVE.
Frequently Asked Questions & Troubleshooting
Q: Why does my site return "500 Internal Server Error"?
A: A 500 error is typically caused by three common reasons:
- Missing or invalid
APP_KEYin your.envfile. - Incorrect file permissions on
storage/orbootstrap/cache/(ensure they are writable). - Incorrect database credentials in the
.envfile. (You can check detailed logs insidelaravel/storage/logs/laravel.log).
Q: How do I create the storage symlink for uploaded files (storage:link)?
A: If your application uses public disk uploads (Storage::url()), you can create the symlink via SSH with php artisan storage:link or create a simple temporary route in routes/web.php:
Route::get('/create-storage-link', function () {
    Artisan::call('storage:link');
    return 'Storage link created successfully!';
});https://domain.com/create-storage-link once in your browser, then remove the route.
Q: How do I change the PHP version for Laravel?
A: In DirectAdmin, go to Account Manager > PHP Settings. Under PHP Version Selector, choose PHP 8.2 or PHP 8.3 and click Save.
Need Further Assistance?
If you encounter any issues deploying or configuring your Laravel web application in DirectAdmin, our technical support team is available 24/7. Feel free to submit a support ticket through your client area for prompt assistance.
