


PHP is the foundational programming language of the web, powering millions of custom web applications, portals, content management systems, e-commerce storefronts, and legacy websites. Whether you are deploying a simple procedural PHP website or a traditional custom-coded web application with a MySQL/MariaDB database, DirectAdmin provides an optimized, secure, and flexible hosting environment.
With DirectAdmin powered by CloudLinux PHP Selector, you can easily switch between multiple PHP versions (from legacy PHP 7.4 to modern PHP 8.3), enable/disable PHP extensions on the fly, create and manage MySQL databases via phpMyAdmin, upload files with high-speed compression tools, and secure your site with free Let’s Encrypt SSL certificates.
In this comprehensive guide, we will walk you through both methods of hosting a PHP website in DirectAdmin:
- Method 1: Hosting a PHP Website Without a Database (Static or procedural PHP pages, contact forms, dynamic scripts).
- Method 2: Hosting a Custom/Legacy PHP Website With a MySQL Database (Database-driven web apps, custom CMS, portals, and configuration files).
Prerequisites
- An active Web Hosting account with DirectAdmin.
- A domain name configured in DirectAdmin (see How to Add a Domain Name in DirectAdmin) or a subdomain (see How to Create a Subdomain in DirectAdmin).
- Your domain pointed to Aveshost nameservers (refer to Where to find Aveshost nameservers).
- An active SSL certificate installed and HTTPS enforced (see How to Install an SSL Certificate in DirectAdmin and How to Force HTTP to HTTPS in DirectAdmin).
- Access to your DirectAdmin control panel (see How to Login to DirectAdmin Control Panel).
- Your local PHP project files and (if applicable) your
.sqldatabase export file.
Method 1: Hosting a PHP Website Without a Database
If your PHP website does not require a database (for example, a multi-page business website with PHP headers/footers, contact forms using mail(), or dynamic calculations), follow these simple steps:
Step 1: Prepare and Archive Your PHP Files Locally
- Ensure your main entry file is named
index.php(lowercase). - Select all project files and directories (including
index.php,about.php,contact.php,css/,js/, andimages/) and compress them into a.ziparchive (e.g.php-site.zip).
Important: Compress the files INSIDE the website folder, not the outer parent directory.
Step 2: Access DirectAdmin File Manager
- Log in to your DirectAdmin control panel.
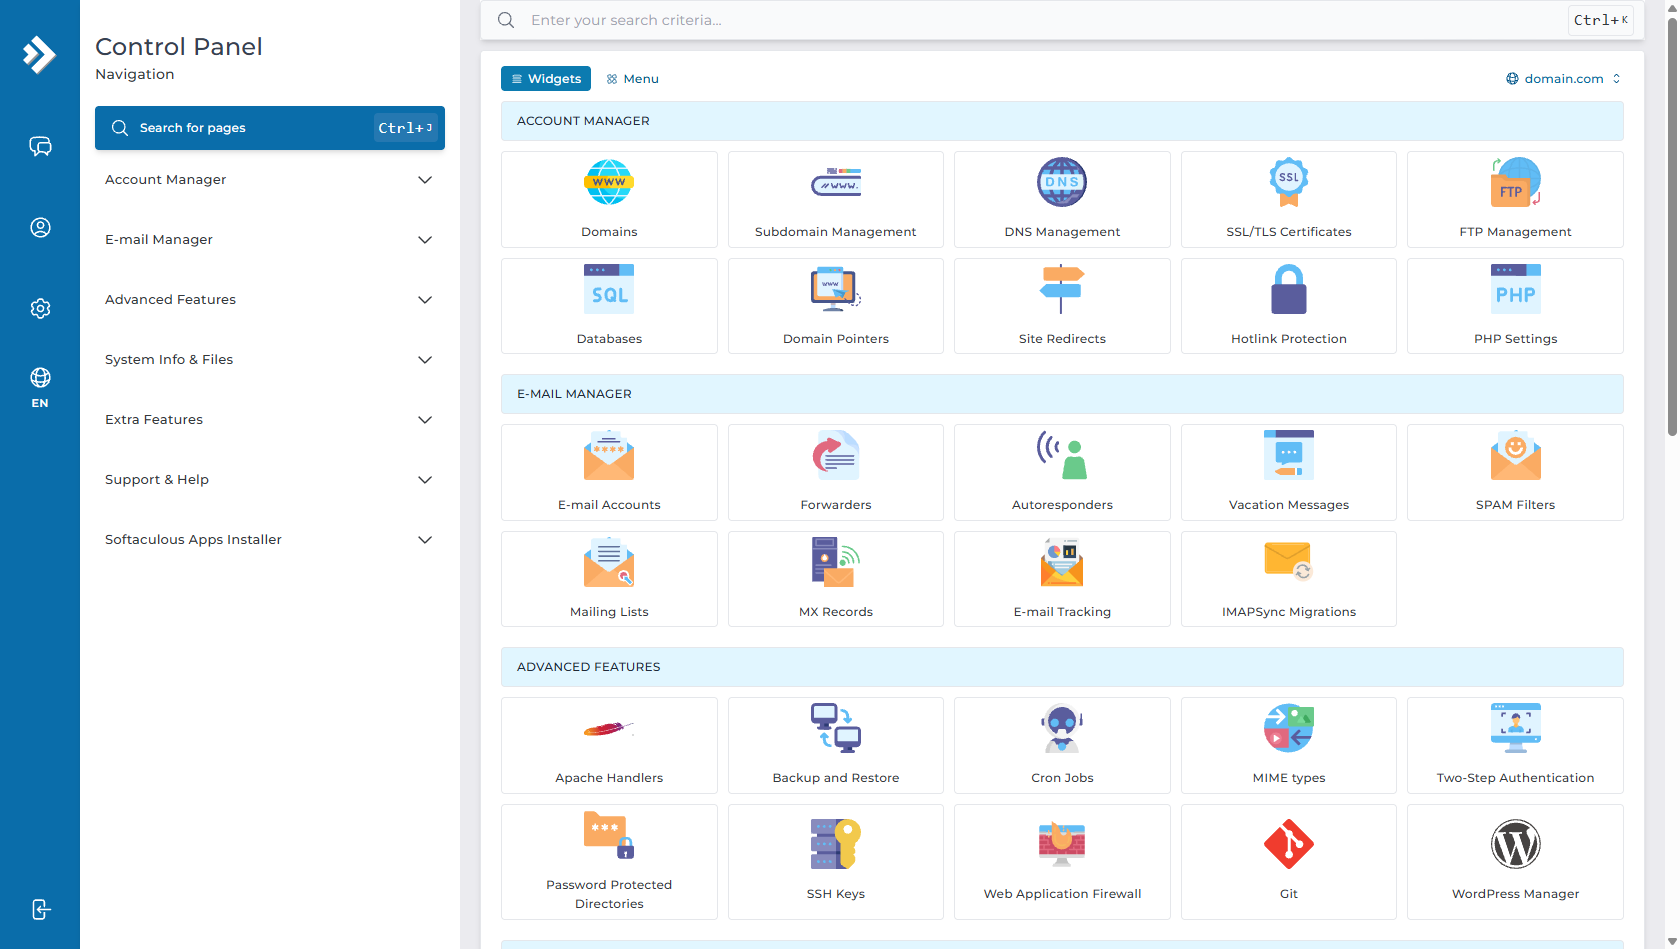
- Under System Info & Files, click on File Manager.
Step 3: Upload and Extract Your PHP Website
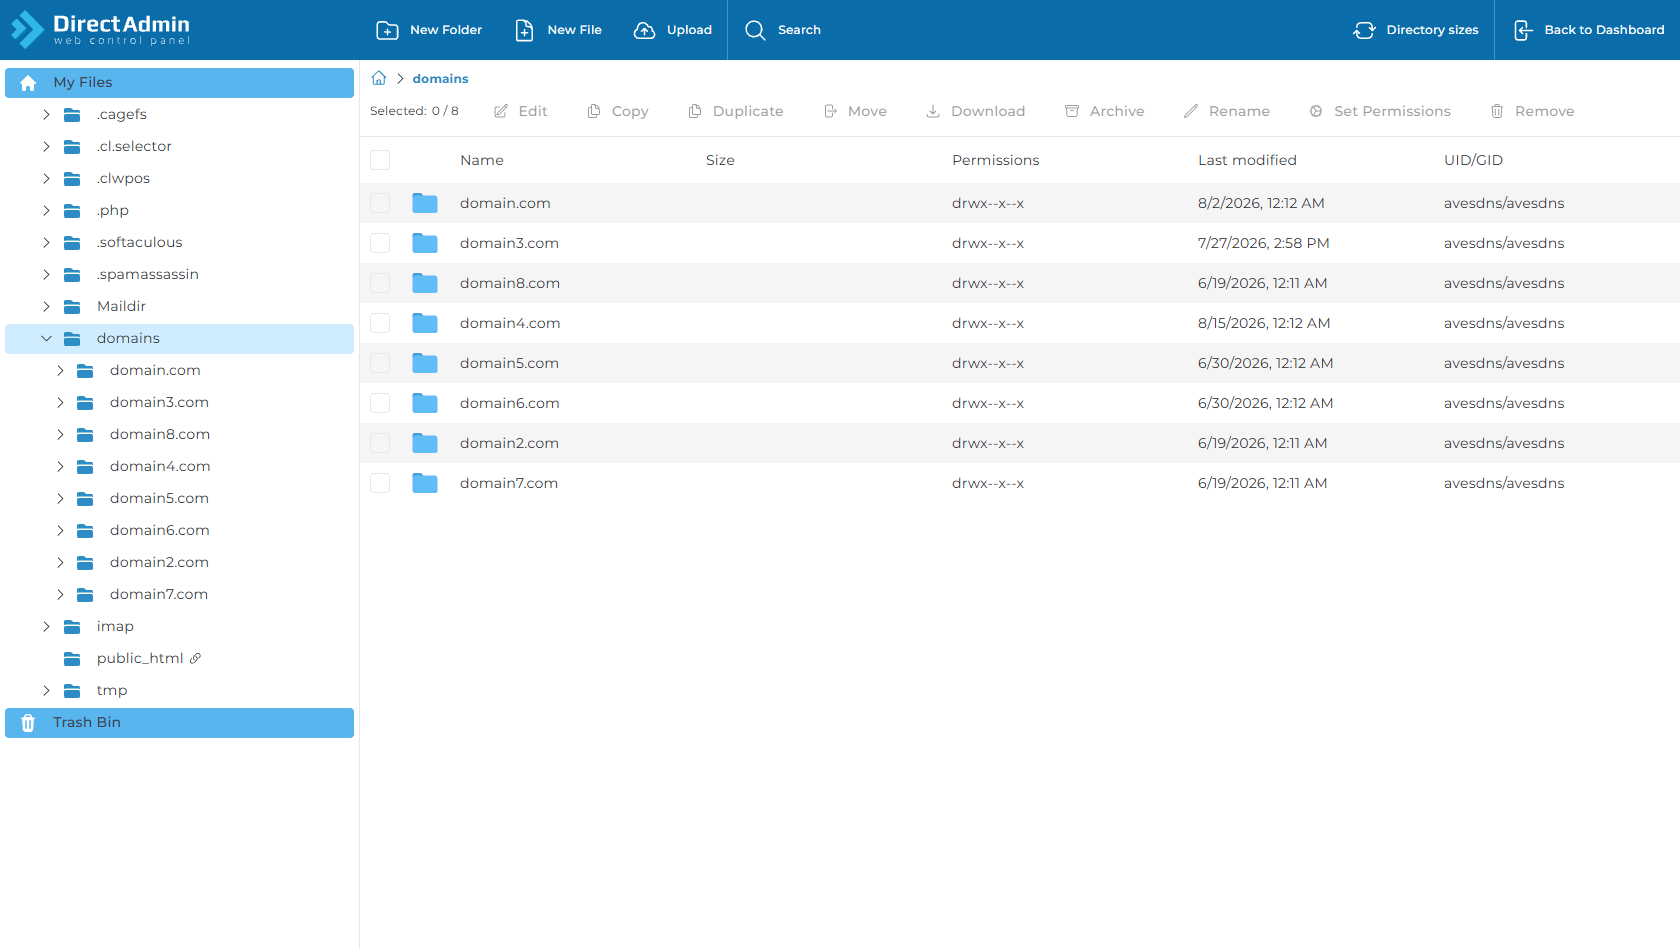
- In File Manager, navigate to your domain’s document root:
(If deploying to a subdomain, navigate todomains > domain.com > public_htmldomains > subdomain.domain.com > public_html). - Delete any default placeholder files (such as a default
index.html). - Click Upload in the top navigation bar and select your
php-site.ziparchive. - Once uploaded, right-click the archive and click Extract. Ensure that
index.phpsits directly insidepublic_html.
Step 4: Verify and Select PHP Version via CloudLinux PHP Selector
To choose your preferred PHP version, DirectAdmin uses the CloudLinux PHP Selector tool:
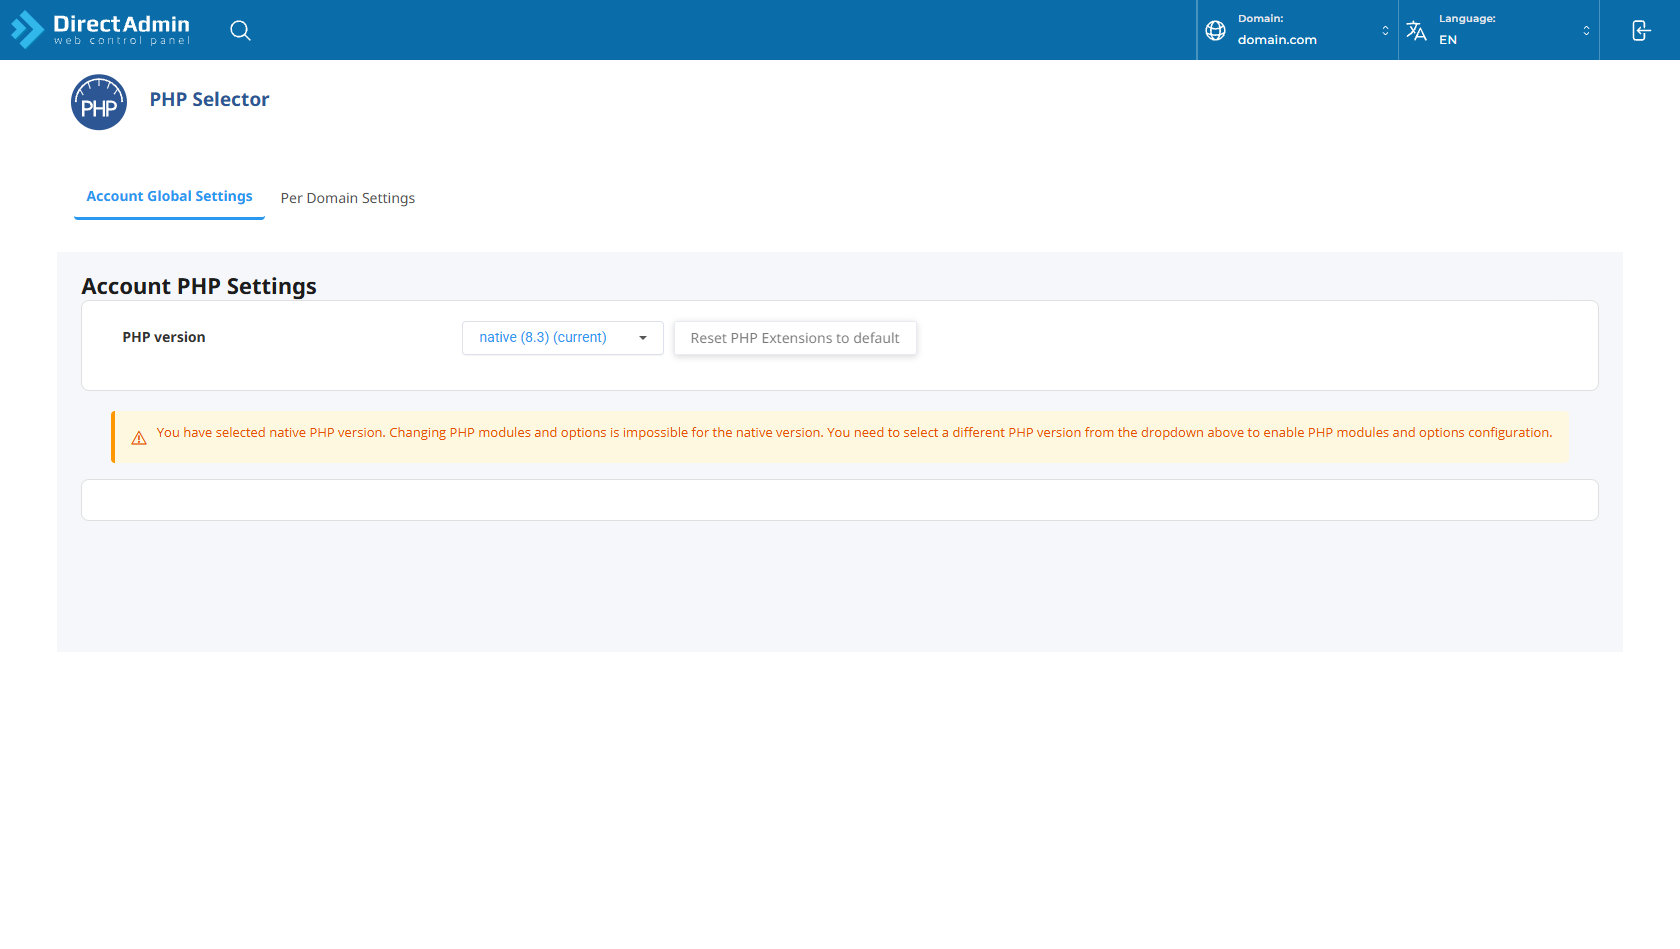
- In DirectAdmin, search for Select PHP Version in the top search bar (or navigate to Extra Features > Select PHP version in the left sidebar).
- In the PHP Selector dashboard under Account PHP Settings, click the PHP version dropdown.
- Select your preferred PHP version (e.g., 8.2, 8.3, or native (8.3)) and click Set as current.
- Visit
https://domain.comin your browser to verify your live PHP website!
Method 2: Hosting a Custom / Legacy PHP Website With a MySQL Database
If your PHP application uses a MySQL database (such as a custom CMS, member portal, e-commerce store, or legacy procedural PHP app), follow this complete database deployment workflow:
Step 1: Export Your Database Backup (.sql)
From your local development environment (or previous web host), open phpMyAdmin or terminal and export your database as a standard .sql file (e.g., database_backup.sql).
Step 2: Create a MySQL Database & User in DirectAdmin
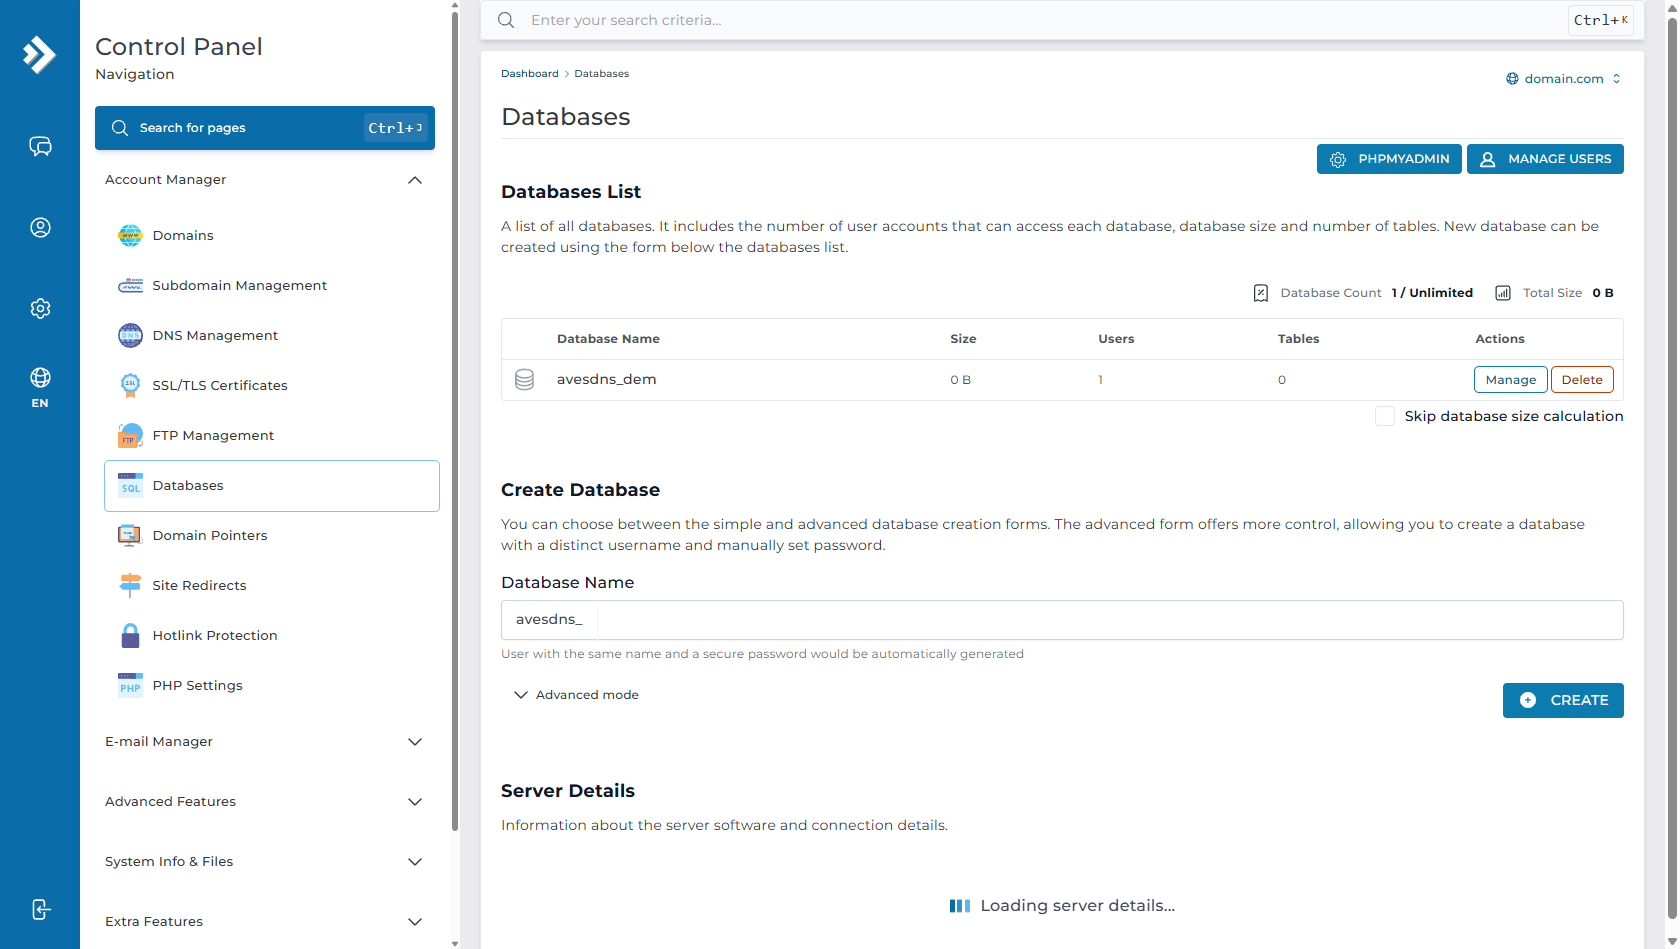
- In DirectAdmin, navigate to Account Manager > Databases.
- Click on the Create Database section.
- Enter your desired Database Name (e.g.,
app_db) and Database Username. - Generate or specify a strong password, then click CREATE.
- Note down your generated Full Database Name (e.g.
avesdns_app_db), Full Username (e.g.avesdns_app_user), and Password.
Step 3: Import Your Database (.sql) via phpMyAdmin
- In DirectAdmin on the Databases page, click the PHPMYADMIN button in the top right corner.
- In phpMyAdmin, select your newly created database from the left-hand navigation tree.
- Click on the Import tab at the top.
- Click Choose File, select your local
database_backup.sqlfile, and click Import (or Go) at the bottom. - You should see a success notification confirming all tables have been imported.
Step 4: Upload and Extract Your PHP Application Files
- In DirectAdmin, go to System Info & Files > File Manager.
- Navigate to
domains > domain.com > public_html. - Upload your website archive (e.g.,
php-app.zip) and extract all files directly intopublic_html.
Step 5: Update the Database Configuration File
Most traditional PHP websites store database credentials in a configuration script (commonly named config.php, db.php, connection.php, db_connect.php, database.php, or inside an includes/ folder).
- In File Manager inside
public_html, locate your database configuration file. - Select the file and click Edit.
- Update the host, database name, username, and password with the DirectAdmin credentials created in Step 2:
Example 1: PDO Connection (Modern PHP)
<?php
// config.php - PDO Database Connection
$db_host = 'localhost';          // Standard DirectAdmin DB host is localhost
$db_name = 'avesdns_app_db';      // Full database name from DirectAdmin
$db_user = 'avesdns_app_user';    // Full database username from DirectAdmin
$db_pass = 'YourStrongPassword!'; // Database password
$charset = 'utf8mb4';

$dsn = "mysql:host=$db_host;dbname=$db_name;charset=$charset";
$options = [
    PDO::ATTR_ERRMODE            => PDO::ERRMODE_EXCEPTION,
    PDO::ATTR_DEFAULT_FETCH_MODE => PDO::FETCH_ASSOC,
    PDO::ATTR_EMULATE_PREPARES   => false,
];

try {
    $pdo = new PDO($dsn, $db_user, $db_pass, $options);
} catch (\PDOException $e) {
    die("Database connection failed: " . $e->getMessage());
}
?>
Example 2: MySQLi Connection (Traditional / Procedural PHP)
<?php
// db.php - MySQLi Procedural Connection
$db_host = "localhost";
$db_user = "avesdns_app_user";
$db_pass = "YourStrongPassword!";
$db_name = "avesdns_app_db";

$conn = mysqli_connect($db_host, $db_user, $db_pass, $db_name);

if (!$conn) {
    die("Connection failed: " . mysqli_connect_error());
}
?>- Click Save in File Manager.
Step 6: Select PHP Version for Legacy Code Compatibility
If your PHP application was developed several years ago, it may use legacy functions deprecated in newer PHP releases (such as older MySQL extensions or specific string functions):
- In DirectAdmin, search for Select PHP Version in the top search bar (or go to Extra Features > Select PHP version).
- In the CloudLinux PHP Selector, select the compatible PHP version:
- For older legacy scripts: Choose PHP 7.4 or PHP 8.0.
- For modern PHP applications: Choose PHP 8.2, PHP 8.3, or native (8.3).
- Click Set as current.
Step 7: Test and Verify Your Live Website
- Open your browser and navigate to
https://domain.com. - Test key database functionalities such as user logins, dynamic data retrieval, and form submissions to confirm everything is communicating with MySQL seamlessly!
Performance & Security Best Practices
1. Prevent Directory Indexing via .htaccess
To prevent visitors from browsing directory contents if an index.php file is missing in a subfolder, add this rule to your public_html/.htaccess file:
Options -Indexes2. Protect Sensitive Configuration Files
Block direct HTTP access to configuration and database files by adding this rule to your .htaccess:
<FilesMatch "^(config|db|database|connection)\.php$">
    Order Allow,Deny
    Deny from all
</FilesMatch>
Frequently Asked Questions & Troubleshooting
Q: Why do I see "Access denied for user 'username'@'localhost'"?
A: This error occurs when the database username or password in your config.php file does not match the credentials created in DirectAdmin. Verify that you are using the full database username (including the account prefix, e.g. username_dbuser) and the exact password.
Q: Why do I get a blank white screen (White Screen of Death)?
A: A blank screen indicates a PHP fatal error while display_errors is turned off. To troubleshoot:
- Check the error log file inside DirectAdmin File Manager (
public_html/error_log). - Temporarily enable error reporting at the top of your
index.php:ini_set('display_errors', 1); error_reporting(E_ALL); - Ensure the selected PHP version in CloudLinux PHP Selector matches your script requirements.
Q: How do I enable or disable required PHP extensions (like cURL, GD, ZIP, or mbstring)?
A: In DirectAdmin, search for Select PHP Version (under Extra Features > Select PHP version). In the CloudLinux PHP Selector interface, select any non-native PHP version (e.g., 8.2 or 8.3) to view and toggle all available PHP extensions with a single click.
Need Further Assistance?
If you need any assistance transferring your custom PHP website or connecting your database in DirectAdmin, our technical support team is available 24/7. Feel free to submit a support ticket through your client area for expert help.
