


Python is a versatile, high-level programming language renowned for its readability, vast library ecosystem, and powerful web development capabilities. Django is the premier Python web framework, designed to help developers build secure, scalable, and maintainable web applications rapidly with built-in features such as the Django ORM, an automatic Admin Interface, robust authentication, and CSRF protection.
DirectAdmin hosting provides native support for Python and Django applications powered by the CloudLinux Setup Python App (Passenger / WSGI) manager. This allows you to create isolated Python virtual environments, select your desired Python version (Python 3.9, 3.10, 3.11, or 3.12), install dependencies with Pip, and run production-grade WSGI web applications effortlessly.
In this comprehensive guide, we will walk you step-by-step through configuring, deploying, and managing a Python / Django web application in DirectAdmin.
Prerequisites
- An active Web Hosting account with DirectAdmin.
- A domain name configured in DirectAdmin (see How to Add a Domain Name in DirectAdmin) or a subdomain (see How to Create a Subdomain in DirectAdmin).
- Your domain pointed to Aveshost nameservers (refer to Where to find Aveshost nameservers).
- An active SSL certificate installed and HTTPS enforced (see How to Install an SSL Certificate in DirectAdmin and How to Force HTTP to HTTPS in DirectAdmin).
- Access to your DirectAdmin control panel (see How to Login to DirectAdmin Control Panel).
- A local Python / Django project with a generated
requirements.txtfile.
Step-by-Step Guide: How to Deploy Python and Django in DirectAdmin
Step 1: Prepare Your Django Project Locally
Before uploading your Django project, ensure production settings and dependencies are properly configured:
- Generate requirements.txt: Open your terminal in your local project directory and export your packages:
pip freeze > requirements.txt - Configure settings.py: Open your project's
settings.pyand configure the following:- ALLOWED_HOSTS: Add your domain name:
ALLOWED_HOSTS = ['domain.com', 'www.domain.com', '127.0.0.1'] - DEBUG: Set to
Falsefor production:DEBUG = False - STATIC & MEDIA Settings: Configure static and media asset paths so that the web server can serve them directly:
STATIC_URL = '/static/'
STATIC_ROOT = os.path.join(BASE_DIR, 'public_html/static')

MEDIA_URL = '/media/'
MEDIA_ROOT = os.path.join(BASE_DIR, 'public_html/media')
- ALLOWED_HOSTS: Add your domain name:
- Compress project files: Compress your Django project files (including
manage.py,requirements.txt, and your application modules) into a.ziparchive (e.g.django-app.zip).
Note: Exclude local virtual environments (venv/),.git/, and__pycache__/folders.
Step 2: Access "Setup Python App" in DirectAdmin
- Log in to your DirectAdmin control panel.
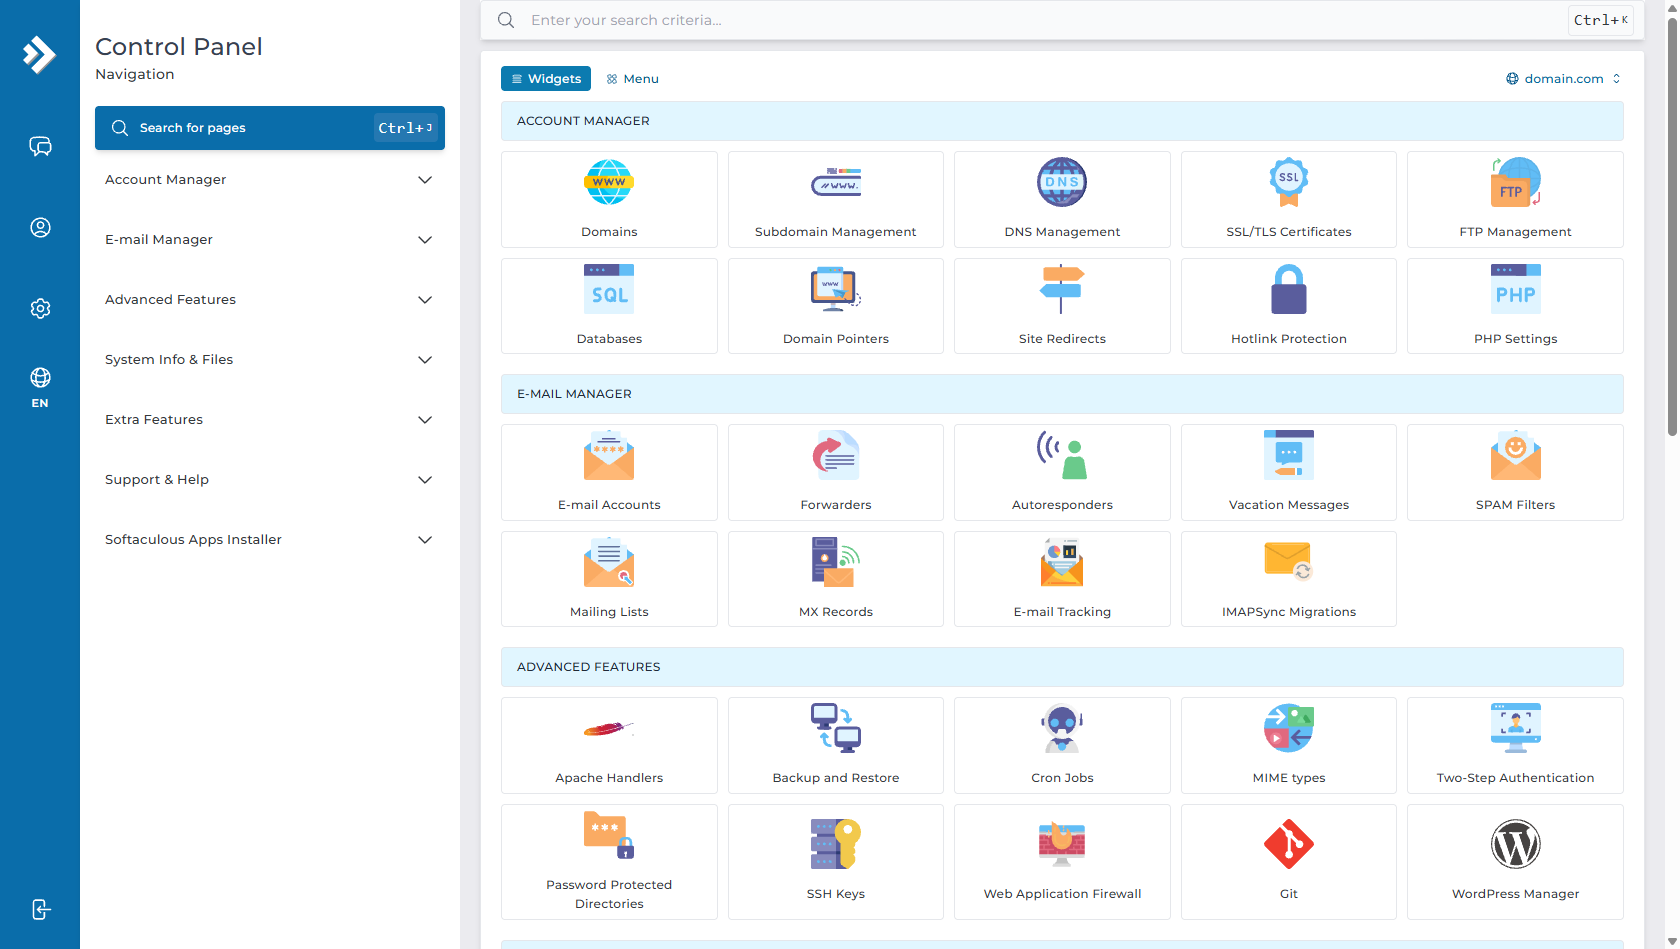
- In the top search bar, search for Setup Python App (or navigate to Extra Features > Setup Python App in the left sidebar).
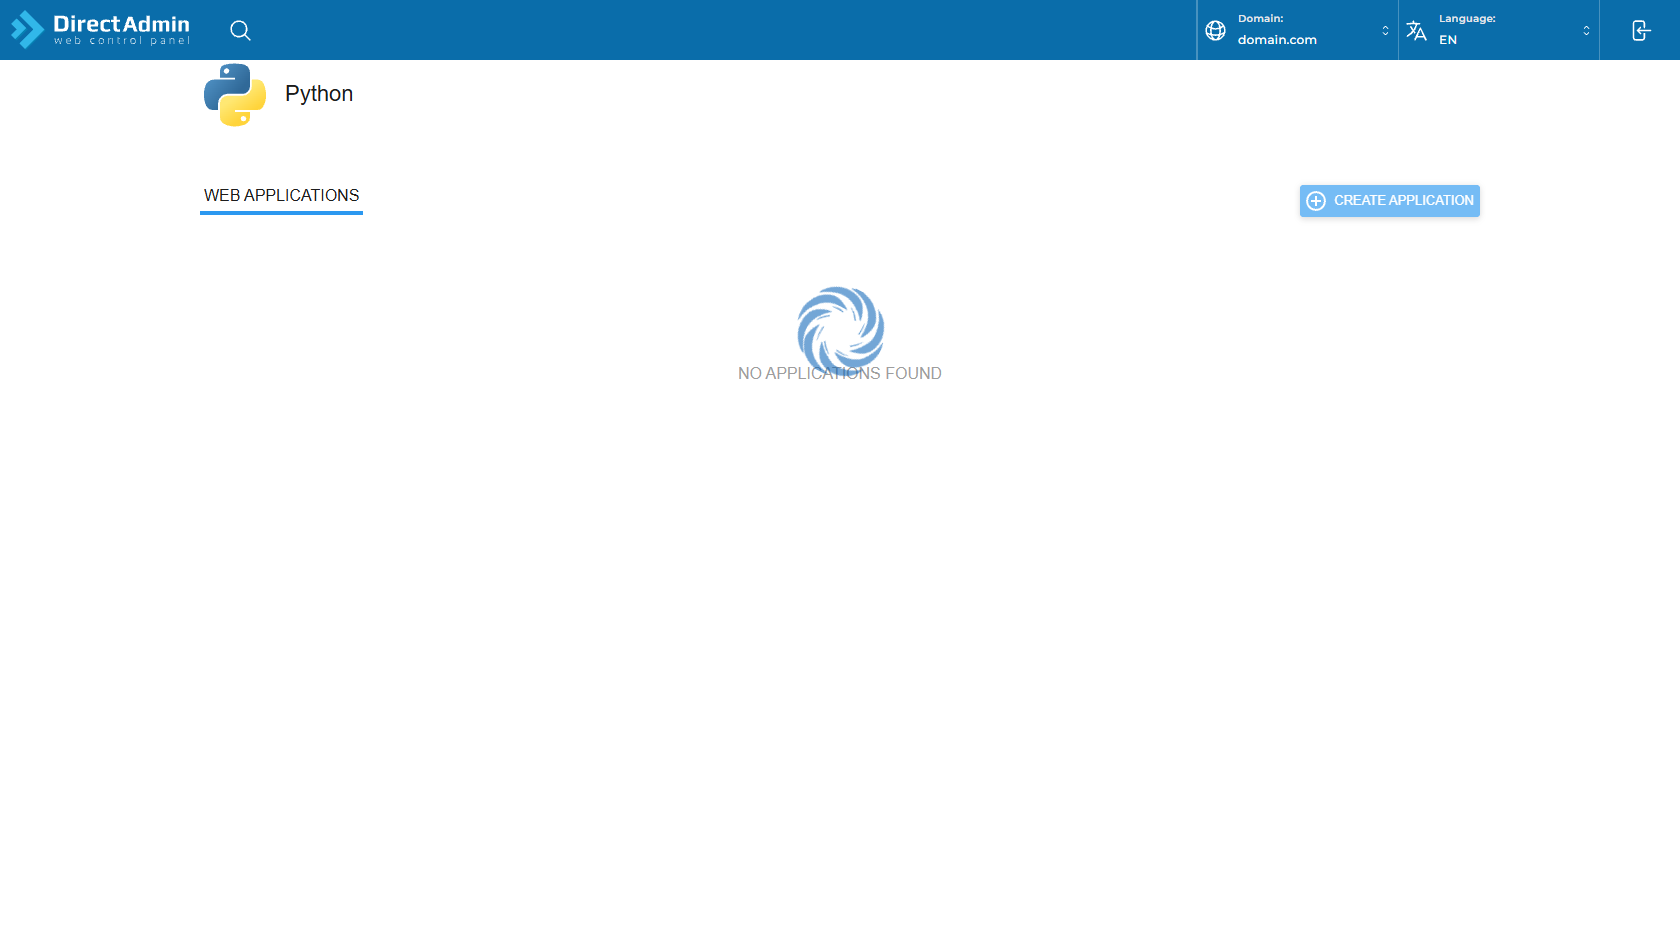
- Click the + CREATE APPLICATION button in the top right corner.
Step 3: Configure Application Settings
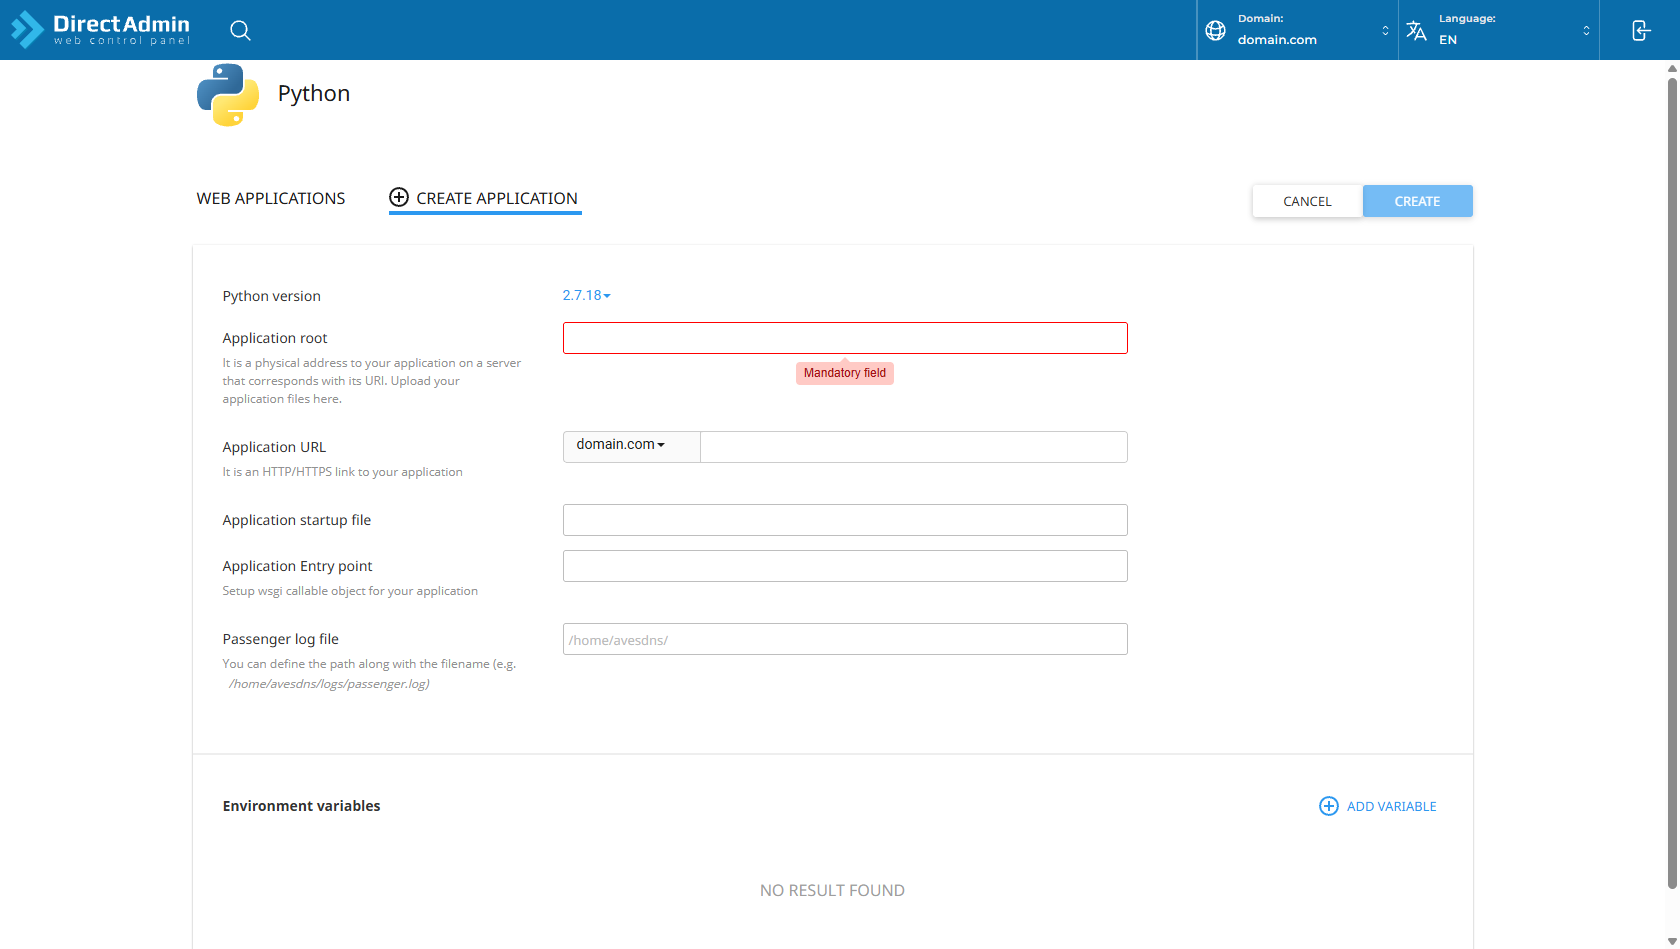
Fill out the application creation form with the following settings:
| Setting | Recommended Value | Description |
|---|---|---|
| Python version | 3.10, 3.11, or 3.12 |
Select the Python version matching your project requirements. |
| Application root | django-app |
The folder name where your Python project files will reside. |
| Application URL | domain.com |
Select your target domain name from the dropdown. |
| Application startup file | passenger_wsgi.py |
The WSGI entry script used by the web server. |
| Application Entry point | application |
The callable WSGI object name. |
- Click CREATE. DirectAdmin will create an isolated virtual environment and a default
passenger_wsgi.pyfile.
Step 4: Upload and Extract Your Project Files
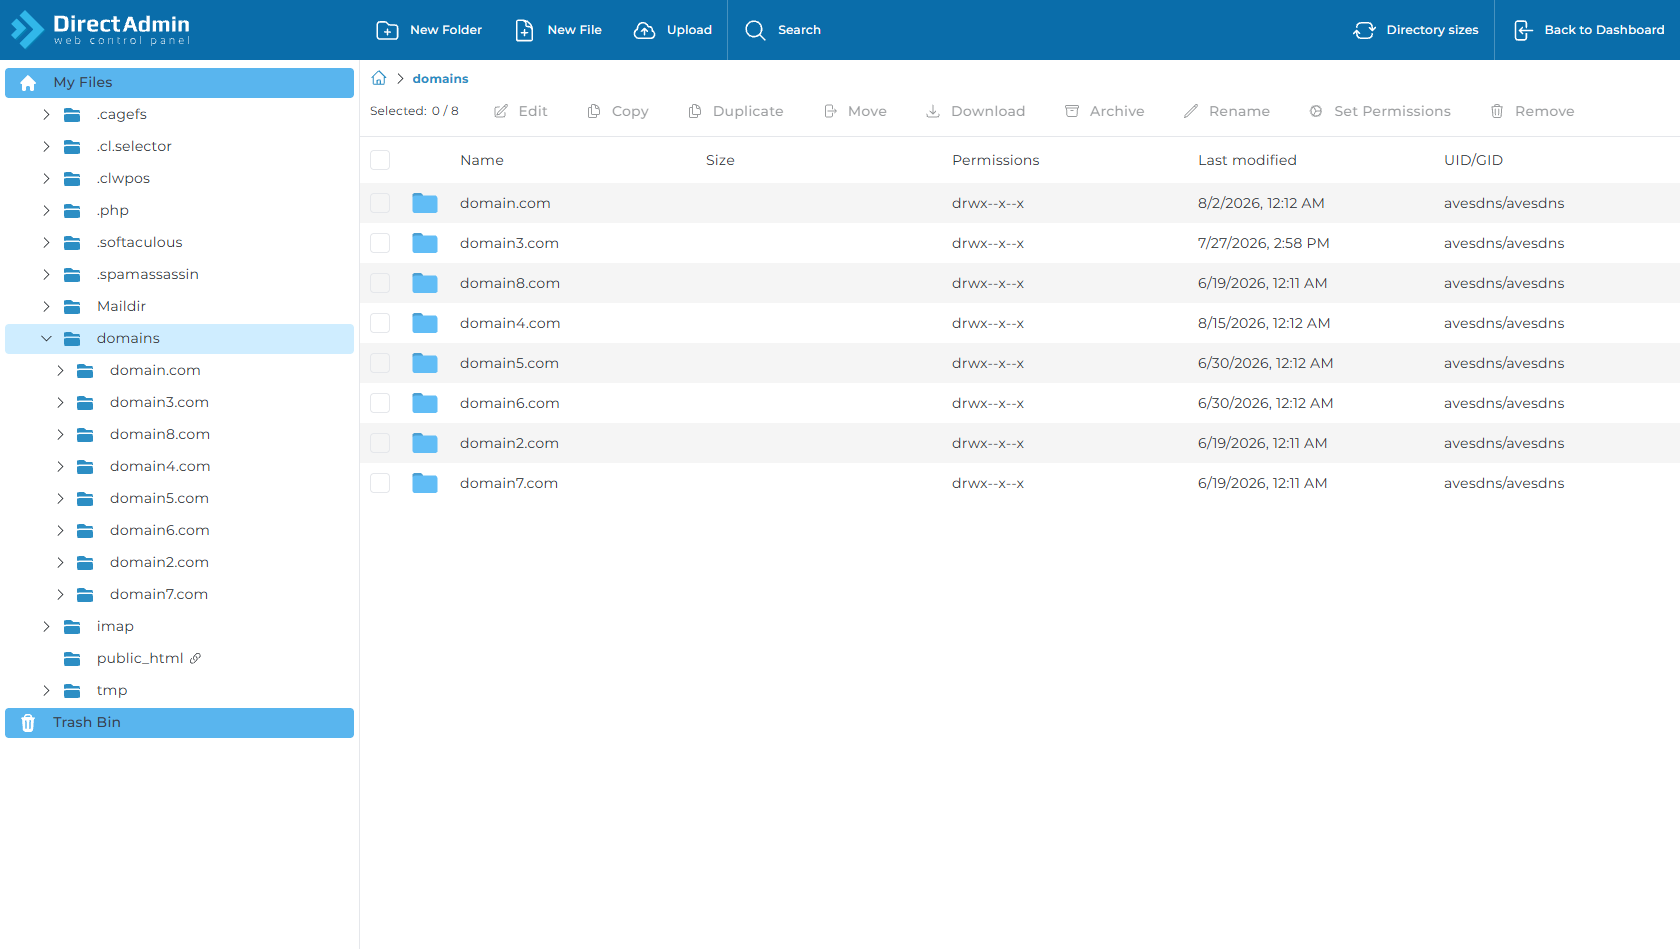
- In DirectAdmin, navigate to System Info & Files > File Manager.
- Navigate into your application root folder (e.g.
django-appordomains > domain.com > django-app). - Click Upload in the top navigation bar and upload your
django-app.zipfile. - Right-click the uploaded ZIP file and click Extract.
Step 5: Configure passenger_wsgi.py
DirectAdmin creates a starter passenger_wsgi.py. We must update it to point to our Django project's WSGI application:
- In File Manager inside your Application Root directory (
django-app), selectpassenger_wsgi.pyand click Edit. - Replace its contents with the following WSGI configuration:
import os import sys # Add project root directory to Python path project_dir = os.path.dirname(os.path.abspath(__file__)) sys.path.insert(0, project_dir) # Set Django settings module (replace 'myproject' with your Django project name) os.environ.setdefault('DJANGO_SETTINGS_MODULE', 'myproject.settings') # Import Django WSGI Handler from django.core.wsgi import get_wsgi_application application = get_wsgi_application() - Click Save.
Step 6: Install Python Dependencies via Pip
- Return to Setup Python App in DirectAdmin and click the Edit icon on your application.
- Scroll down to the Configuration files section.
- In the text box, enter
requirements.txtand click Add. - Click Run Pip Install. DirectAdmin will automatically install all specified Python libraries (including Django) into your application’s isolated virtual environment!
Step 7: Run Migrations & Collect Static Files
To run management commands like database migrations and static collection, open the DirectAdmin Terminal (or connect via SSH):
- Copy the virtual environment activation command shown at the top of your Setup Python App page:
source /home/username/virtualenv/django-app/3.11/bin/activate && cd /home/username/django-app - Run your database migrations:
python manage.py migrate - Collect static files for the Admin dashboard:
python manage.py collectstatic --noinput - Create your superuser administrator account:
python manage.py createsuperuser
Step 8: Restart and Verify Your Application
- In Setup Python App, click the Restart button at the top.
- Open your web browser and visit
https://domain.comandhttps://domain.com/admin. - Your Python / Django web application is now live and fully operational!
Deploying Plain Python / Flask Web Applications
If you are deploying a lightweight Flask application or simple Python script instead of Django, your passenger_wsgi.py file should look like this:
import sys
import os

# Add application directory to sys.path
sys.path.insert(0, os.path.dirname(os.path.abspath(__file__)))

# Import Flask app instance as 'application'
from app import app as application
Frequently Asked Questions & Troubleshooting
Q: Why does my site show "Passenger Error" or a 500 error?
A: This error typically occurs due to an unhandled Python exception, syntax error, or missing dependency. To diagnose:
- Check your Passenger error log configured in Step 3 (e.g.,
/home/username/logs/passenger.log). - Ensure all required libraries are installed via
requirements.txt. - Verify that the
applicationcallable inpassenger_wsgi.pymatches your WSGI object name.
Q: How do I fix the "DisallowedHost at /" error in Django?
A: Open your settings.py file and add your exact domain and subdomains to ALLOWED_HOSTS = ['domain.com', 'www.domain.com'], then restart the application.
Q: Why are static files (CSS/JS) not loading in Django Admin?
A: Ensure you configured STATIC_ROOT = os.path.join(BASE_DIR, 'public_html/static') and executed python manage.py collectstatic in the terminal so that static assets are placed in the public web root.
Q: How do I restart the Python application after making code changes?
A: In DirectAdmin, go to Setup Python App and click Restart. Alternatively, you can create or touch the tmp/restart.txt file in your application root folder.
Need Further Assistance?
If you need any help configuring your Python environment or deploying your Django application in DirectAdmin, our technical support team is available 24/7. Feel free to submit a support ticket through your client area for expert assistance.
