


DKIM (DomainKeys Identified Mail) is an essential email authentication standard that protects your domain reputation, prevents email spoofing, and ensures your emails reach the recipient's primary inbox instead of the Spam or Junk folder.
When DKIM is enabled, your DirectAdmin mail server attaches a cryptographic digital signature to the header of every outgoing email. The recipient's mail provider (such as Google Gmail, Yahoo Mail, Microsoft Outlook, or Apple Mail) verifies this signature against the public DKIM key published in your domain's DNS records. If the keys match, the receiving server confirms that the message genuinely came from your domain and was not altered or intercepted in transit.
Major email providers—including Google and Yahoo—now strictly require DKIM authentication for all domain senders. In this step-by-step tutorial, we will show you how to enable DKIM with a single click in DirectAdmin, verify your public key record in DNS Management, copy records for external DNS providers (like Cloudflare), and test your live email authentication.
Prerequisites
- An active Web Hosting account with DirectAdmin.
- A domain name configured in DirectAdmin (see How to Add a Domain Name in DirectAdmin) or a subdomain (see How to Create a Subdomain in DirectAdmin).
- Your domain pointed to Aveshost nameservers (refer to Where to find Aveshost nameservers).
- An active SSL certificate installed and HTTPS enforced (see How to Install an SSL Certificate in DirectAdmin and How to Force HTTP to HTTPS in DirectAdmin).
- Access to your DirectAdmin control panel (see How to Login to DirectAdmin Control Panel).
- An active email account created in DirectAdmin (see How to Create an Email Account in DirectAdmin).
Step-by-Step Guide: How to Enable DKIM in DirectAdmin
Step 1: Access E-mail Accounts in DirectAdmin
- Log in to your DirectAdmin control panel.
- In the top search bar, search for E-mail Accounts (or navigate to E-mail Manager > E-mail Accounts in the left sidebar).
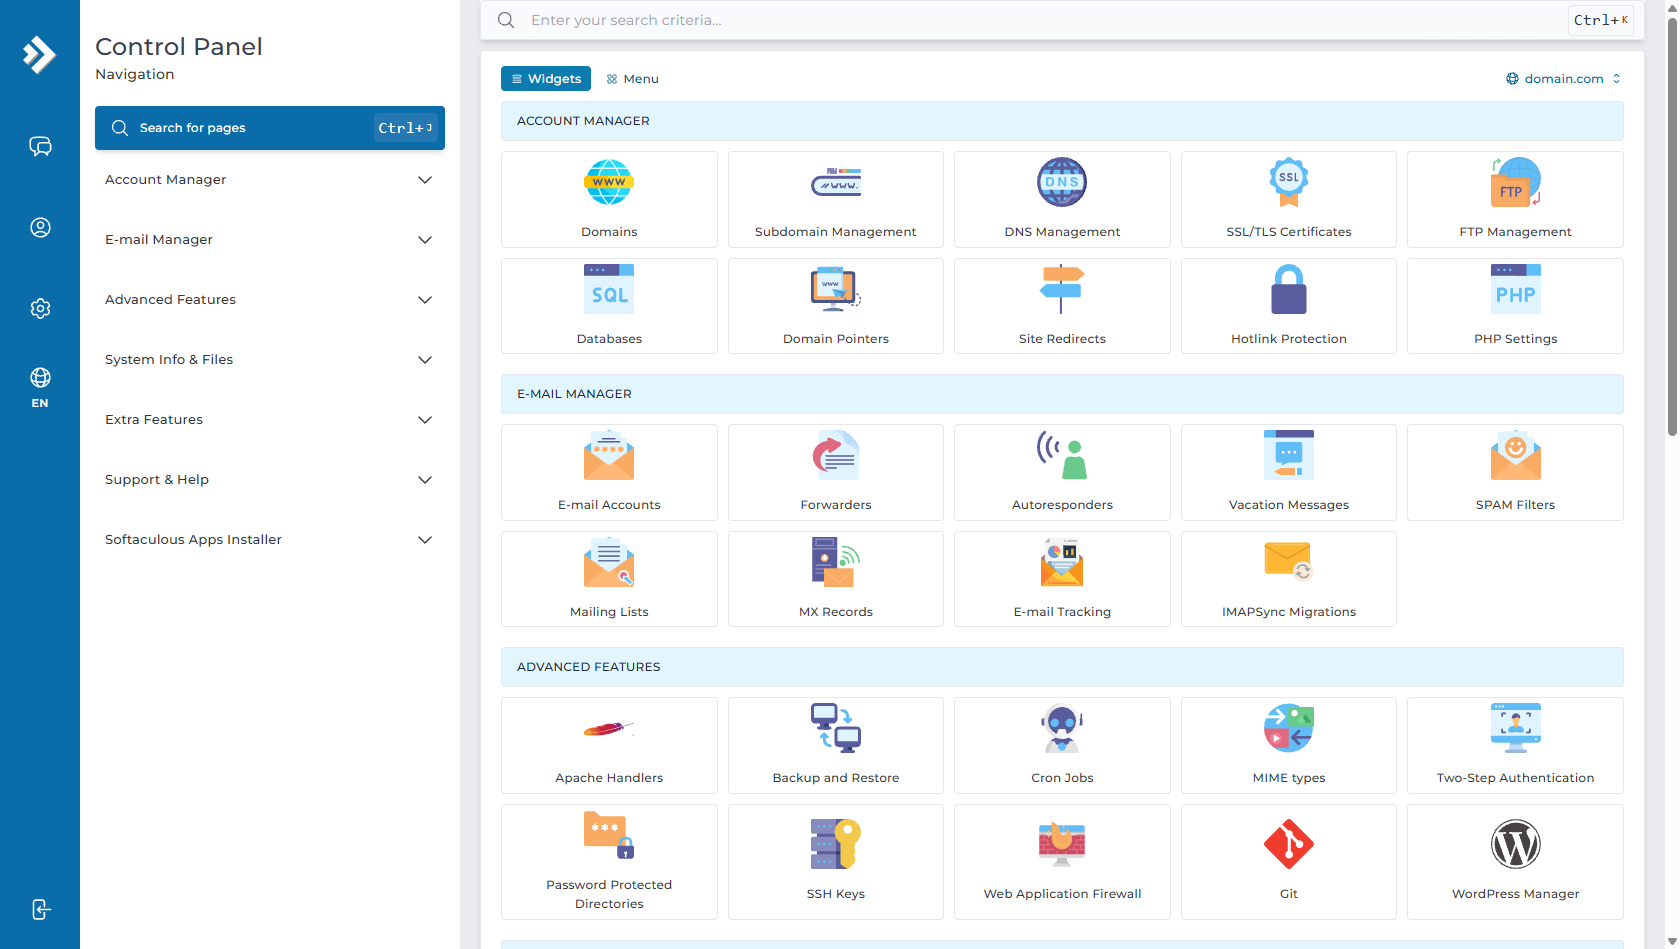
- You will be taken to the E-mail Accounts dashboard for your selected domain.
Step 2: Enable DKIM with 1-Click
- In the top right corner of the E-mail Accounts dashboard, locate the blue ENABLE DKIM button.
- Click ENABLE DKIM.
- DirectAdmin will instantly:
- Generate a secure 2048-bit RSA private key on your server.
- Configure the Exim mail server to sign all outgoing emails with this key.
- Automatically publish the corresponding public key as a
TXTrecord in your domain's DNS zone (x._domainkey.domain.com).
- Once activated, the button will update to display DISABLE DKIM, confirming that DKIM signing is live.
Step 3: Verify the DKIM Public Key in DNS Management
- In DirectAdmin, navigate to Account Manager > DNS Management (or Advanced Features > DNS Management).
- Scroll down or search for the
TXTrecord with the name x._domainkey. - The record value will contain your public key string formatted like:
"v=DKIM1; k=rsa; p=MIIBIjANBgkqhkiG9w0BAQEFAAOCAQ8AMIIBCgKCAQEA..."
Step 4: If Using External DNS (Cloudflare, Namecheap, GoDaddy)
If your domain's nameservers point to an external DNS provider (such as Cloudflare, Namecheap, or GoDaddy), your DNS records are managed outside DirectAdmin. You must copy the DKIM public key into your external DNS provider:
- From DirectAdmin DNS Management, copy the TXT Name (
x._domainkey) and the complete TXT Value (v=DKIM1; k=rsa; p=...). - Log in to your external DNS provider (e.g. Cloudflare Dashboard > DNS > Records).
- Click Add record and enter the following:
- Type:
TXT - Name:
x._domainkey - Content: Paste the complete
v=DKIM1; k=rsa; p=...string. - TTL:
Auto
- Type:
- Click Save.
Step 5: Test and Verify DKIM Authentication
To confirm that your outgoing emails are successfully authenticated and signed by DKIM:
- Send a test email from your DirectAdmin mailbox (e.g.
[email protected]) to a personal Gmail or Yahoo address. - In Gmail:
- Open the received test email.
- Click the three dots (More) in the top right corner of the message > select Show original.
- In the Original Message summary table, look at the authentication results:
SPF: PASS with IP ...
DKIM: 'PASS' with domain domain.com
DMARC: 'PASS'
- If you see DKIM: PASS, your domain is fully authenticated and protected against spoofing!
The Complete Email Authentication Trio: SPF, DKIM, and DMARC
For maximum email deliverability and compliance with Google and Yahoo sender standards, make sure all three DNS records are configured:
| Protocol | DNS Record Type | Example Record Value | Purpose |
|---|---|---|---|
| SPF | TXT (root: @) |
v=spf1 a mx ip4:107.178.111.179 ~all |
Specifies which mail servers and IP addresses are authorized to send mail for your domain. |
| DKIM | TXT (x._domainkey) |
v=DKIM1; k=rsa; p=MIIBIjAN... |
Cryptographically signs outgoing messages to verify authenticity and message integrity. |
| DMARC | TXT (_dmarc) |
v=DMARC1; p=none; sp=none; rua=mailto:[email protected] |
Instructs recipient mail servers how to handle emails that fail SPF or DKIM checks. |
Frequently Asked Questions & Troubleshooting
Q: How do I know if DKIM is enabled on my domain?
A: In DirectAdmin E-mail Accounts, the button in the top right will display DISABLE DKIM, and an x._domainkey TXT record will be visible in DNS Management.
Q: Why does Gmail show "DKIM: None" or "DKIM: Fail"?
A: If your domain uses Cloudflare, Namecheap, or another external DNS service, the TXT record created inside DirectAdmin is not visible to the internet until you copy the x._domainkey TXT record over to your external DNS provider.
Q: Can I regenerate a new DKIM key pair?
A: Yes. In DirectAdmin E-mail Accounts, click DISABLE DKIM, wait a moment, and then click ENABLE DKIM. DirectAdmin will generate a fresh private and public key pair.
Q: Does enabling DKIM cause any downtime or affect incoming emails?
A: No. DKIM only signs outgoing emails sent from your mailboxes. It causes zero downtime and does not affect your incoming emails, stored messages, or email accounts.
Need Further Assistance?
If you need any help enabling DKIM, configuring SPF and DMARC records, or troubleshooting email deliverability issues, our technical support team is available 24/7. Feel free to submit a support ticket through your client area for expert assistance.
